10 Simple Ways to Save Water for Your Family
Water is a precious resource that we often take for granted. However, water conservation not only saves money but also helps protect the environment. Below are 10 simple ways for you to save water on a daily basis.
1. Use Low-Flow Faucets and Showerheads: A Smart Water-Saving Strategy
Water is a finite resource, and with growing concerns about water scarcity, it’s essential that we use this precious commodity responsibly. When it comes to water conservation in our homes, one of the most effective strategies is to use low-flow faucets and showerheads. This section delves into the importance of this approach, why it matters, and how it can significantly contribute to saving water.

The Water Consumption Challenge
Traditional faucets and showerheads can be water guzzlers. In particular, bathtubs are known for their high water consumption. Filling up a standard bathtub can use anywhere from 36 to 48 gallons (136 to 181 liters) of water, depending on its size. This is a substantial amount considering that the average bath lasts for around 8 to 15 minutes.
Showerheads, if not water-efficient, can also contribute to excessive water use. An ordinary showerhead typically releases 2.5 gallons (9.5 liters) of water per minute. A 15-minute shower, for instance, could consume 37.5 gallons (142 liters) of water.
The Low-Flow Solution
Low-flow faucets and showerheads offer a straightforward yet highly effective solution to the water consumption challenge. These fixtures are designed to restrict the flow of water while maintaining adequate water pressure for typical household needs. By incorporating them into your daily routine, you can conserve a significant amount of water without sacrificing the quality of your showers or other water-related activities.
Low-Flow Showerheads: Saving Water, One Drop at a Time
Low-flow showerheads are specifically engineered to reduce water consumption during your daily showers. They achieve this by aerating the water, mixing it with air to create a steady stream that feels just as powerful as traditional showerheads but uses significantly less water. On average, low-flow showerheads release 1.5 gallons (5.7 liters) of water per minute, half the amount of a standard showerhead. This water-saving measure can make a substantial impact on your household’s water use.
Low-Flow Faucets: Cutting Down Water Waste
Low-flow faucets operate on the same principle as low-flow showerheads. They control the flow of water to ensure that you have sufficient water for washing your hands, dishes, or any other task while using far less water than conventional faucets. On average, low-flow faucets release about 1.5 gallons (5.7 liters) of water per minute, as opposed to the typical 2.2 gallons (8.3 liters) per minute that standard faucets deliver.
The Benefits of Low-Flow Fixtures
- Water Conservation: The most obvious benefit of low-flow fixtures is their water-saving capabilities. They allow you to use water more efficiently and reduce your household’s overall water consumption, which, in turn, decreases your water bills.
- Energy Savings: Using less hot water for showers means you’re also using less energy to heat the water. This leads to savings on your energy bills while reducing the environmental impact associated with water heating.
- Environmental Impact: By conserving water, you’re contributing to the preservation of this finite resource and reducing the strain on local water supplies. Moreover, it lessens the energy required to pump, treat, and heat water, thus decreasing greenhouse gas emissions.
- Financial Savings: Lower water and energy bills translate to financial savings over time, making the initial investment in low-flow fixtures a cost-effective choice.
How to Choose Low-Flow Fixtures
When selecting low-flow faucets and showerheads, consider the following factors:
- Flow Rate: Look for fixtures with a flow rate of 1.5 gallons per minute or less for both showerheads and faucets. This flow rate ensures significant water savings without compromising performance.
- Quality and Durability: Invest in fixtures from reputable manufacturers to ensure they are built to last and perform well over time.
- Aesthetics: Low-flow fixtures are available in a variety of styles and finishes, so choose those that match your bathroom or kitchen decor.
- Installation: If you’re not comfortable with DIY installation, consider hiring a professional plumber to ensure the fixtures are properly installed.
Using low-flow faucets and showerheads is an effective and easy way to save water in your home. It’s a simple switch that can lead to substantial water and energy savings, reduced water bills, and a positive impact on the environment. By embracing these water-saving fixtures, you’re not only contributing to water conservation but also setting a sustainable example for your household and future generations.
2. Fix Leaky Faucets: A Guide to Preventing Water Waste
Water is a precious resource, and any form of waste, no matter how small, can have a significant impact on both your water bills and the environment. Leaky faucets, showerheads, and toilets are common sources of water waste in many households. In this section, we’ll delve into the importance of addressing leaks promptly, how to identify and fix them, and why this simple yet vital task is a key part of responsible water management.

The Consequences of Leaky Fixtures
Leaky fixtures, whether it’s a faucet, showerhead, or toilet, can waste a surprising amount of water over time. These seemingly minor leaks can lead to major water bills and contribute to the depletion of local water supplies. Let’s explore the consequences of each type of leak:
- Leaky Faucets: A dripping faucet may seem harmless, but it can result in a significant water loss. The average rate of a dripping faucet is about one drop per second. In one day, this seemingly insignificant leak can waste over 2,000 gallons (7,570 liters) of water in a year.
- Showerhead Leaks: Similar to faucets, a leaking showerhead can add up quickly. It’s common for a showerhead leak to result from a worn-out washer or seal. This type of leak can waste hundreds of gallons of water annually.
- Toilet Leaks: Leaky toilets can be especially sneaky as the water often escapes silently into the bowl. The most common cause is a worn flapper valve, but other components may also be at fault. Toilet leaks can waste up to 200 gallons (757 liters) of water per day.
The Importance of Prompt Repairs
The importance of fixing leaks promptly cannot be overstated. Here’s why it matters:
- Water Conservation: The obvious benefit is water conservation. By addressing leaks, you’re preventing the wastage of a valuable resource. It’s an essential part of responsible water management, especially in regions with water scarcity.
- Cost Savings: Repairing leaks can lead to significant financial savings. Conserving water means lower water bills, and the sooner you address the leaks, the less water and money will be wasted.
- Environmental Impact: Water leaks result in the unnecessary pumping and treatment of water, which consumes energy and increases greenhouse gas emissions. By repairing leaks, you’re reducing this environmental impact.
How to Identify and Repair Leaks
Here’s how you can identify and repair common household leaks:
- Faucet Leaks:
- Turn off all the water sources in your home to ensure that no water is running anywhere.
- Check the dripping faucet and determine the location of the leak (usually at the spout or handle).
- Depending on the source of the leak, you may need to replace a washer, O-ring, or a cartridge. It’s a good idea to consult your faucet’s user manual or contact a professional plumber for guidance.
- Showerhead Leaks:
- Start by ensuring the shower is turned off, and there is no water running in the bathroom.
- Disassemble the showerhead by removing the faceplate or cover.
- Inspect the rubber washer and the seal to identify any wear and tear.
- Replace the washer, seal, or other damaged parts, and reassemble the showerhead.
- Toilet Leaks:
- A common sign of a toilet leak is when water trickles into the bowl long after flushing. This usually occurs because the flapper valve is worn.
- Open the toilet tank and inspect the flapper valve, flush valve, and overflow tube.
- Replace any worn-out components, and ensure the flapper valve forms a tight seal after flushing.
In many cases, fixing these leaks is a DIY task that requires basic plumbing knowledge and a few tools. However, if you’re not comfortable with the process or the leak is more complex, it’s wise to consult a professional plumber. They can quickly diagnose the issue and ensure that the repair is done correctly.
3. Running the Dishwasher and Washing Machine When Full: Saving Water and Energy
Dishwashers and washing machines are convenient appliances in our daily lives, but they have the potential to consume a significant amount of water and energy. One of the easy ways to reduce water and energy consumption in your home is to run the dishwasher and washing machine only when they are full. In this section, we will analyze why this is important, how to do it effectively, and the many benefits it offers.

Why Running the Dishwasher and Washing Machine When Full Matters?
- Water Savings: Running the dishwasher or washing machine when it’s not full not only wastes water but also ensures that you are not wasting water on dishes or laundry that you can wait to accumulate and run in a single load.
- Energy Savings: Dishwashers and washing machines consume energy to operate. When you run them when they’re not full, you’re also wasting energy that you could save by running them less frequently.
- Cost Savings: Dishwashers and washing machines typically account for a significant portion of your water and energy bills. Running them less frequently results in lower water and energy bills.
How to Implement:
- Running the Dishwasher When Full:
- Ensure that the dishwasher is fully loaded with enough dishes to run a full cycle. There is usually a maximum capacity guideline in the appliance’s user manual.
- Use an appropriate wash program based on the type of dishes you have. Quick wash or energy-saving programs can be used if the dishes are not heavily soiled.
- Running the Washing Machine When Full:
- Ensure that the washing machine has a full load of laundry to run a complete cycle. Typically, the washing machine will have a maximum load capacity specified in the user manual.
- Use the appropriate washing program based on the type of laundry you have. Quick wash or energy-saving programs can be used if the clothes are not heavily soiled.
Additional Benefits:
In addition to water and energy savings, running the dishwasher and washing machine when they’re full offers other advantages:
- Better Cleaning: Running a full load of dishes or laundry typically results in better cleaning and more efficient use of detergent.
- Appliance Preservation: Running the dishwasher and washing machine when they’re full can help preserve the appliances by reducing wear and tear from excessive use.
- Environmental Protection: Saving water and energy benefits the environment by reducing the strain on water sources and the power grid.
Running the dishwasher and washing machine when they are full is an easy and effective way to save water and energy in your home. In addition to reducing your water and energy bills, you are also playing an important role in protecting the environment and our precious resources. Make this practice a habit and encourage other members of your household to do the same.
4. Install a Rainwater Harvesting System: A Sustainable Water Source for Your Home
Installing a rainwater harvesting system is a sustainable and environmentally friendly approach to meeting your water needs, especially for outdoor purposes like watering plants and gardens. In this section, we will explore the importance of rainwater harvesting, how to set up a system, and the various benefits it offers, including reducing the demand on the municipal water supply.

Why Rainwater Harvesting Matters:
- Water Conservation: Rainwater harvesting is an effective way to conserve water, as it allows you to utilize rainwater for non-potable purposes, such as irrigation and outdoor cleaning. By doing so, you reduce your reliance on treated municipal water, which is often unnecessary for these activities.
- Reducing Utility Bills: Utilizing harvested rainwater can lead to cost savings by reducing your water bills. By using rainwater for irrigation, you decrease the amount of municipal water you consume, which is especially significant in areas with tiered water pricing based on consumption.
- Sustainable and Eco-Friendly: Rainwater harvesting is an eco-conscious choice that contributes to environmental sustainability. It decreases the demand on local water sources and eases the energy and resources required for water treatment and distribution.
How to Set Up a Rainwater Harvesting System:
- Collection System: The first step in rainwater harvesting is to collect rainwater from your roof. A typical setup includes gutters and downspouts to channel rainwater into a collection tank.
- Storage Tank: Choose an appropriate storage tank for your harvested rainwater. Tanks come in various sizes and materials, such as polyethylene or concrete. Select a tank that suits your needs and available space.
- Filtration: To ensure the collected rainwater is clean and free from debris, install a filtration system. A first flush diverter can be used to divert the initial dirty rainwater away from the tank, while a fine mesh screen can remove smaller particles.
- Treatment (Optional): Depending on your intended use, you may want to incorporate treatment methods such as UV sterilization or chlorination to ensure the water’s quality.
- Distribution System: Design a distribution system to transport harvested rainwater to where it’s needed. This can involve gravity-fed hoses or pumps for greater distances and elevation changes.
- Regulation: Be aware of local regulations and codes related to rainwater harvesting. Some areas may have restrictions or requirements, so ensure your system complies with all relevant regulations.
Benefits of a Rainwater Harvesting System:
- Water Savings: The most obvious benefit is water savings. Rainwater is a free and sustainable source for outdoor use, reducing your reliance on costly municipal water.
- Reduced Energy Use: Rainwater harvesting reduces the energy needed for water treatment and distribution, contributing to a smaller carbon footprint.
- Resilience: A rainwater harvesting system can provide a backup water source during droughts or water supply disruptions.
- Garden and Plant Health: Rainwater is naturally soft and lacks the minerals found in tap water. It’s ideal for watering plants, as it won’t leave mineral deposits in the soil or on leaves.
Maintenance:
Proper maintenance is crucial for the efficiency and longevity of your rainwater harvesting system. Regularly clean the gutters and screens to prevent clogs and algae growth in the tank. Additionally, inspect the tank for any signs of damage and ensure the distribution system remains functional.
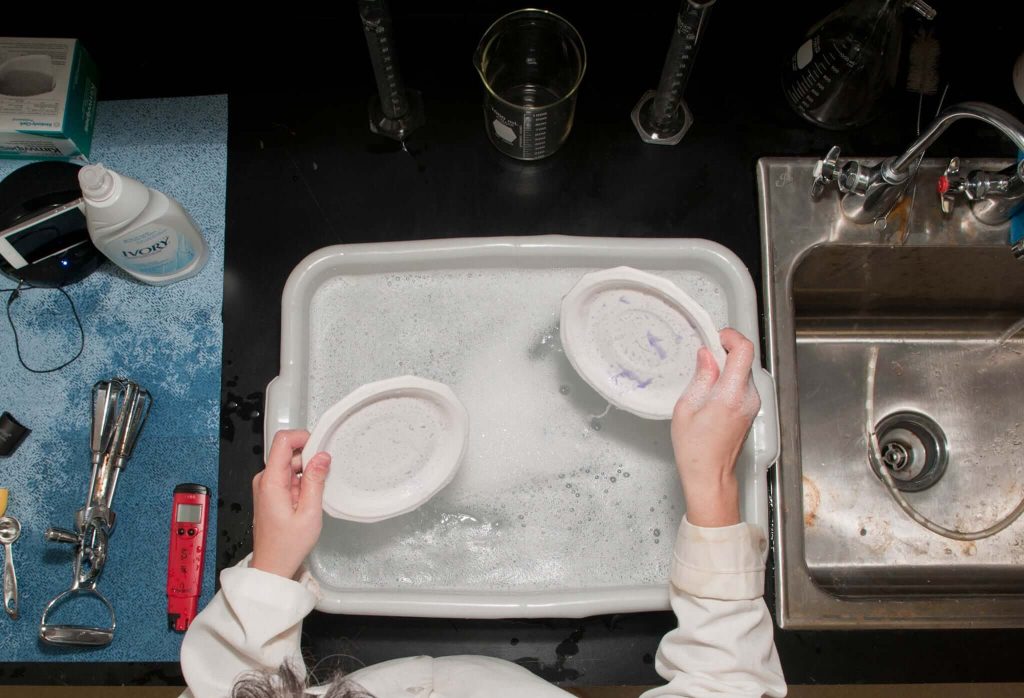
5. Use a Basin While Washing Dishes: A Simple Water-Saving Practice
One of the simplest and most effective ways to reduce water consumption in your home is by using a basin while washing dishes by hand. By collecting and reusing the water that would typically go down the drain, you can significantly decrease your environmental impact and contribute to water conservation. In this section, we’ll delve into the importance of this practice, how to implement it, and the benefits it offers, including using the collected water for various outdoor tasks.
Why Using a Basin Matters:
- Water Conservation: The use of a basin while washing dishes allows you to save and reuse the water that would otherwise be wasted when the tap runs continuously. This practice can lead to substantial water savings in the long run.
- Environmental Impact: Reducing water wastage through this simple method helps lower the demand on local water sources and minimizes the energy and resources required for water treatment and distribution. It’s an eco-conscious choice.
- Cost Savings: By using less water, you’ll see a decrease in your water bills. In regions with tiered pricing based on consumption, this can result in even more significant savings.
How to Implement Using a Basin:
- Select a Basin: Choose a suitable basin that fits comfortably in your sink. It should be large enough to collect the water effectively but small enough not to obstruct your ability to wash dishes.
- Position the Basin: Place the basin in the sink, ensuring it sits securely and is stable. Adjust it so that it can capture the water from both washing and rinsing dishes.
- Wash and Rinse Dishes: As you wash the dishes, allow the water to flow into the basin instead of down the drain. Be mindful of the water level in the basin, and adjust the tap as needed to maintain a constant water supply.
- Collecting Water: The water collected in the basin can now be repurposed for other household tasks. You can use it to water indoor or outdoor plants, clean surfaces, or perform various other chores that require water.
- Storage and Disposal: If you don’t use all the collected water immediately, consider transferring it to a container for storage. Ensure that you use the water within a reasonable time to prevent stagnation.
Benefits of Using a Basin:
- Water Savings: The primary advantage is water savings. By collecting and reusing the water used for washing dishes, you can significantly reduce your overall water consumption.
- Lower Environmental Impact: The practice of using a basin contributes to a lower environmental impact by decreasing the demand on local water sources and reducing the energy and resources needed for water treatment.
- Cost Reduction: Reduced water consumption translates to lower water bills, leading to cost savings for your household.
- Versatile Water Source: The collected water can be repurposed for a variety of household tasks, making it a versatile and valuable resource.
Maintenance:
Maintaining this practice is simple. Ensure that the basin remains clean and in good condition. If you store collected water for later use, be sure to keep the storage container clean and regularly replace the stored water to prevent stagnation.
6. Rinse Fruits and Vegetables in a Basin: A Water-Saving Practice
Rinsing fruits and vegetables is a common kitchen chore, but the way you do it can make a significant difference in water conservation. Instead of using a continuous stream of running water, you can employ a simple but effective method: rinsing these fresh produce items in a basin. In this section, we’ll explore the importance of this practice, how to implement it, and the many benefits it offers, including conserving water while maintaining food safety.

Why Rinsing in a Basin Matters:
- Water Conservation: Rinsing fruits and vegetables in a basin allows you to conserve water by using only what is necessary for the task. It eliminates the wasteful practice of letting a faucet run continuously while washing produce.
- Environmental Impact: Reducing water wastage through this method decreases the strain on local water sources and minimizes the energy and resources needed for water treatment and distribution. It’s an eco-friendly choice.
- Cost Savings: The water you save by not running the faucet unnecessarily can lead to lower water bills. This is especially important in regions where water is a costly resource.
- Food Safety: Rinsing fruits and vegetables in a basin does not compromise food safety. Proper washing techniques can be employed, and any contaminants or residues are still effectively removed.
How to Implement Rinsing in a Basin:
- Select a Basin: Choose a basin or a large bowl that is appropriate for the volume of fruits and vegetables you plan to rinse. It should comfortably hold your produce while allowing space for washing.
- Fill the Basin: Fill the basin with water to a level that is sufficient for rinsing the produce. The water should cover the fruits and vegetables without overflowing.
- Wash the Produce: Place the fruits and vegetables in the basin of water. Use your hands or a vegetable brush to gently scrub and clean them. Pay special attention to areas that may have soil, dirt, or pesticide residues.
- Rinse and Drain: After washing, remove the produce from the basin and rinse them with clean, cold water to remove any remaining residues or soap. You can use a colander or strainer to do this. The collected water in the basin can be reused for other purposes or disposed of properly.
- Storage and Disposal: If you don’t use all the collected water immediately, consider transferring it to a container for storage. Ensure that you use the water within a reasonable time to prevent stagnation.
Benefits of Rinsing in a Basin:
- Water Savings: The primary benefit is water conservation. Rinsing fruits and vegetables in a basin reduces your water consumption compared to letting the faucet run continuously.
- Lower Environmental Impact: By avoiding excessive water use, you contribute to a reduced environmental impact, including less strain on local water sources and reduced energy and resources required for water treatment.
- Cost Reduction: Less water consumption leads to lower water bills, which can result in financial savings for your household.
- Food Safety: This method maintains food safety while ensuring fruits and vegetables are thoroughly cleaned and free from contaminants.
Maintenance:
Maintaining this practice is straightforward. Ensure that the basin remains clean and in good condition. If you store collected water for later use, keep the storage container clean and replace the stored water regularly to prevent stagnation.
Rinsing fruits and vegetables in a basin is a simple but effective method to conserve water and reduce your environmental impact. It allows you to be mindful of your water usage while maintaining food safety standards. This practice not only contributes to a sustainable future by conserving precious water resources but also provides financial benefits through lower water bills. So, consider using a basin for rinsing fresh produce and embrace the water-saving benefits it offers.
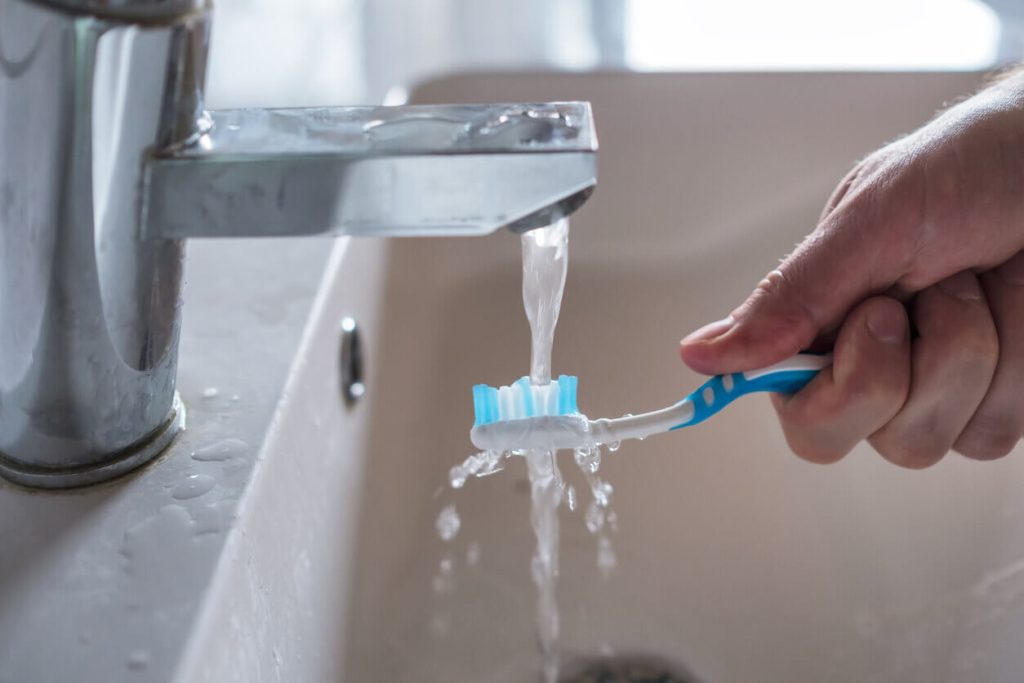
7. Turn Off the Faucet While Brushing Your Teeth and Shaving: A Simple Water-Saving Habit
One of the easiest and most effective ways to reduce water consumption in your daily routine is to turn off the faucet while brushing your teeth and shaving. The continuous flow of water while performing these tasks can lead to significant wastage. In this section, we’ll explore the importance of this practice, how to implement it, and the many benefits it offers, including conserving water and lowering your environmental footprint.
Why Turning Off the Faucet Matters:
- Water Conservation: Turning off the faucet while brushing your teeth and shaving eliminates the unnecessary flow of water. It conserves water by using only what is essential for the task at hand, reducing wastage.
- Environmental Impact: By reducing water wastage, you lower the demand on local water sources and decrease the energy and resources needed for water treatment and distribution. This has a positive impact on the environment.
- Cost Savings: The water you save by not running the faucet continuously can result in lower water bills. This is especially beneficial in regions where water is a costly resource.
- Water Availability: Conserving water through this simple practice contributes to ensuring the availability of water for future generations. It helps preserve this vital resource for a sustainable future.
How to Implement Turning Off the Faucet:
- Begin the Task: Start brushing your teeth or shaving as you normally would, but with the faucet turned off.
- Collect Water: Use a cup or glass to collect a small amount of water for rinsing your mouth, toothbrush, or razor. This can be done without the need for running water.
- Turn On Sparingly: When it’s time to rinse, turn on the faucet only as much as needed to rinse the toothbrush, razor, or your mouth. Be conscious of the water flow and turn it off as soon as you’re finished.
- Considerate Timing: Ensure that you complete your tasks within the shortest time possible to minimize water use.
Benefits of Turning Off the Faucet:
- Water Savings: The most immediate benefit is water conservation. By turning off the faucet, you can significantly reduce your overall water consumption.
- Lower Environmental Impact: By reducing water wastage, you contribute to less strain on local water sources and a decreased demand for energy and resources in water treatment and distribution.
- Cost Reduction: Reduced water consumption leads to lower water bills, providing financial savings for your household.
- Water Availability: Conserving water through this simple practice contributes to ensuring the availability of water for future generations.
Maintenance:
Maintaining this practice is as simple as turning off the faucet while brushing your teeth and shaving. Be mindful of this habit in your daily routine to ensure its effectiveness.
Turning off the faucet while brushing your teeth and shaving is a straightforward yet highly effective method for conserving water and reducing your environmental impact. It is an easy habit to incorporate into your daily routine and can make a substantial difference. This practice not only benefits your finances through lower water bills but also contributes to environmental sustainability by conserving precious water resources. So, make this simple change in your daily habits and be part of the solution for a sustainable future.
8. Choose Water-Efficient Appliances: Making Sustainable Home Choices

Selecting water-efficient appliances is a pivotal step in promoting sustainable living and reducing water consumption in your household. These appliances, such as dishwashers and washing machines, are designed to maximize efficiency while minimizing water use. In this section, we’ll delve into the importance of choosing water-efficient appliances, how to identify them, and the many benefits they offer, including reducing water and energy consumption while contributing to a sustainable future.
Why Choosing Water-Efficient Appliances Matters:
- Water Conservation: Water-efficient appliances are specifically designed to use the least amount of water necessary to accomplish their tasks effectively. They contribute to significant water savings in your household.
- Energy Efficiency: Many water-efficient appliances, especially those labeled with ENERGY STAR, are not only water-efficient but also energy-efficient. This dual benefit leads to lower water and energy consumption, reducing environmental impact.
- Cost Savings: Water-efficient appliances can lead to cost savings over time. Lower water and energy consumption translates to reduced utility bills, making them a wise financial choice.
- Environmental Impact: By reducing water and energy consumption, you lower the environmental impact associated with water treatment, distribution, and the energy needed to operate appliances. This benefits the environment and conserves precious resources.
How to Choose Water-Efficient Appliances:
- Look for ENERGY STAR Label: When shopping for appliances, particularly dishwashers and washing machines, seek those with the ENERGY STAR label. This label signifies that the appliance meets or exceeds strict efficiency guidelines set by the U.S. Environmental Protection Agency (EPA).
- Read the Water Factor (WF): The Water Factor (WF) is a metric that indicates the efficiency of a dishwasher. A lower WF value signifies greater water efficiency. Check for this value in the appliance’s specifications.
- Review the Consortium for Energy Efficiency (CEE) Rating: Washing machines may have a CEE rating that signifies their efficiency in water and energy use. Higher-rated machines are more efficient.
- Check Water-Saving Features: Research specific water-saving features in appliances. For example, some washing machines offer load-sensing technology, which adjusts water levels based on the size of the load, optimizing water use.
- Consider Other Factors: Apart from water efficiency, also consider other features and factors that meet your needs, such as capacity, durability, and cycle options. A well-rounded appliance will ensure efficient use and longevity.
Benefits of Water-Efficient Appliances:
- Water Savings: The primary advantage is significant water savings, contributing to a more sustainable water use pattern in your home.
- Energy Efficiency: Water-efficient appliances often use less energy as well, leading to lower energy bills and a reduced carbon footprint.
- Cost Reduction: By using less water and energy, you’ll see cost savings in your utility bills over time.
- Environmental Benefits: Choosing water-efficient appliances supports the environment by reducing the energy and resources needed for water treatment and distribution. It also conserves water for a sustainable future.
Maintenance:
To maintain the efficiency of water-efficient appliances, follow the manufacturer’s recommendations for cleaning and maintenance. Regularly clean filters, check for leaks, and use appliances according to their instructions to ensure optimal performance and longevity.
Choosing water-efficient appliances is a significant step toward sustainable living and water conservation. These appliances offer numerous benefits, including reduced water and energy consumption, lower utility bills, and a smaller environmental footprint. When shopping for appliances, look for the ENERGY STAR label and consider other water-saving features that can further enhance efficiency. By making this sustainable choice, you not only benefit your household but also contribute to a more environmentally responsible and water-conscious future.
9. Insulate Hot Water Pipes: Maximizing Energy Efficiency
One of the often-overlooked but highly effective methods for enhancing the energy efficiency of your home is insulating hot water pipes. This simple practice can lead to considerable savings in terms of both energy and cost. In this section, we’ll explore the importance of insulating hot water pipes, how to implement it, and the numerous benefits it offers, including more efficient hot water delivery and reduced heat loss.

Why Insulating Hot Water Pipes Matters:
- Energy Efficiency: Insulating hot water pipes helps to minimize heat loss during the journey from your water heater to the faucets and fixtures in your home. This means that hot water remains hot, leading to greater energy efficiency and less demand on your water heater.
- Cost Savings: By retaining the heat of your hot water for longer periods, you can see a noticeable reduction in your energy bills. Your water heater won’t need to work as hard or as frequently to maintain the desired water temperature.
- Faster Hot Water Delivery: Insulated pipes ensure that hot water reaches your faucets and fixtures more quickly, reducing the time you need to wait for the water to heat up. This is particularly beneficial for homes with larger layouts or those located in colder climates.
- Environmental Impact: A reduction in energy usage equates to a lower environmental impact. You contribute to the conservation of energy resources and a decrease in greenhouse gas emissions.
How to Implement Pipe Insulation:
- Identify the Pipes: First, identify the hot water pipes in your home. These are typically the ones connected to your water heater and extend to various faucets, showers, and appliances. They are often located in basements, crawl spaces, and attics.
- Choose the Right Insulation: Select appropriate insulation material for your hot water pipes. Common options include foam pipe insulation, fiberglass wrap, or pre-formed pipe sleeves. Ensure that the chosen insulation material is suitable for your pipe diameter and material.
- Measure and Cut: Measure the length of the hot water pipes and cut the insulation material to the required lengths. Be precise to avoid gaps or excessive overlaps.
- Install the Insulation: Open the insulation material along its length and wrap it around the hot water pipes. Make sure there are no gaps or exposed areas. Use adhesive or tape to secure the insulation in place.
- Seal the Joints: Use tape or adhesive to seal any joints or seams in the insulation material. This prevents heat from escaping and ensures a snug fit.
Benefits of Pipe Insulation:
- Energy Efficiency: Insulating hot water pipes keeps the water hot as it travels through the plumbing system, minimizing the need for the water heater to reheat water, which results in significant energy savings.
- Cost Reduction: Less energy consumption leads to lower energy bills. This practice can make a notable difference in your household budget over time.
- Quick Hot Water Delivery: With insulated pipes, hot water reaches your fixtures more rapidly, eliminating the need for long wait times and reducing water wastage.
- Environmental Benefits: Reduced energy consumption and the associated environmental impact are positive outcomes of insulating hot water pipes. It’s a choice that supports a greener and more sustainable future.
Maintenance:
Maintaining pipe insulation is relatively straightforward. Regularly inspect the insulation for any signs of wear, damage, or gaps. If you notice any issues, promptly repair or replace the insulation to maintain its effectiveness.
Insulating hot water pipes is a small investment that offers significant returns in terms of energy efficiency, cost savings, and environmental benefits. By keeping hot water hotter for longer, you reduce the workload on your water heater and enjoy faster hot water delivery. This practice not only benefits your household budget but also supports the environment by conserving energy resources and reducing greenhouse gas emissions. It’s a simple yet impactful step toward a more energy-efficient and sustainable home.
10. Using Warm Water Instead of Hot Water: A Sustainable Choice
One of the effective ways to reduce both energy and water consumption in your home is by opting to use warm water instead of hot water for various tasks. This simple yet impactful practice not only helps conserve resources but also lowers your utility bills. In this section, we’ll delve into the importance of using warm water, how to implement it, and the numerous benefits it offers, including energy and water conservation.

Why Using Warm Water Matters:
- Energy Conservation: When you use hot water, your water heater works to heat the water to a higher temperature. By using warm water, you save energy because the water heater doesn’t need to heat the water as much. This results in reduced energy consumption and a smaller carbon footprint.
- Water Conservation: In many cases, using warm water is sufficient for tasks like showering, washing dishes, or doing laundry. It means that you’re using less hot water, conserving both water resources and the energy required to heat it.
- Cost Savings: Using warm water instead of hot water can lead to lower utility bills. Less energy and water consumption translate into financial savings for your household.
- Environmental Impact: Reduced energy and water usage result in a lower environmental impact. By minimizing your resource consumption, you contribute to a more sustainable and eco-friendly lifestyle.
How to Implement Using Warm Water:
- Adjust Your Water Heater: Lower the temperature setting on your water heater. Most water heaters have a thermostat that allows you to set the water temperature. By choosing a lower temperature, you can ensure that the warm water is at the right temperature for your needs.
- Check Water Temperature at Fixtures: Use a thermometer to check the water temperature coming out of your fixtures. Adjust the hot water and cold water knobs or handles until you achieve the desired warmth. This practice can help you find the ideal balance between hot and cold water for various tasks.
- Use Warm Water for Showers: For showering, especially in warm weather or when you don’t need very hot water, opt for warm water instead of hot. You’ll still enjoy a comfortable shower experience while reducing energy and water consumption.
- Wash Dishes with Warm Water: When washing dishes by hand or using a dishwasher, consider using warm water instead of hot. Most dishwashing tasks can be effectively accomplished with warm water, and this practice conserves resources.
- Adjust Laundry Settings: Many washing machines offer temperature settings for various types of laundry. Choose warm water settings when possible. It’s often suitable for washing clothes and can provide energy and water savings.
Benefits of Using Warm Water:
- Energy Savings: The primary advantage is energy conservation. By reducing the need to heat water to higher temperatures, you lower your energy consumption and reduce your carbon footprint.
- Water Conservation: Using warm water for various tasks means less hot water is required, resulting in water conservation and the reduction of resources.
- Cost Reduction: Lower energy and water consumption lead to lower utility bills, providing financial savings for your household.
- Environmental Benefits: This practice contributes to a reduced environmental impact through decreased energy and water usage, supporting a more sustainable and eco-friendly lifestyle.
Maintenance:
To maintain this practice, regularly check the water temperature settings on your water heater and at your fixtures. Make adjustments as needed to ensure you continue using warm water effectively.
Using warm water instead of hot water for tasks like showering and household chores is a simple but impactful practice. It helps conserve energy and water resources, lowers utility bills, and reduces your environmental footprint. By making this sustainable choice, you not only benefit your household budget but also contribute to a greener and more sustainable future. It’s a small change that can make a big difference in your home’s resource consumption.
Implementing these methods can make a significant difference in water savings and help protect the environment. Start applying them today and encourage your family members to contribute to the goal of water conservation.