How to Easily Clear a Clogged Kitchen Sink at Home
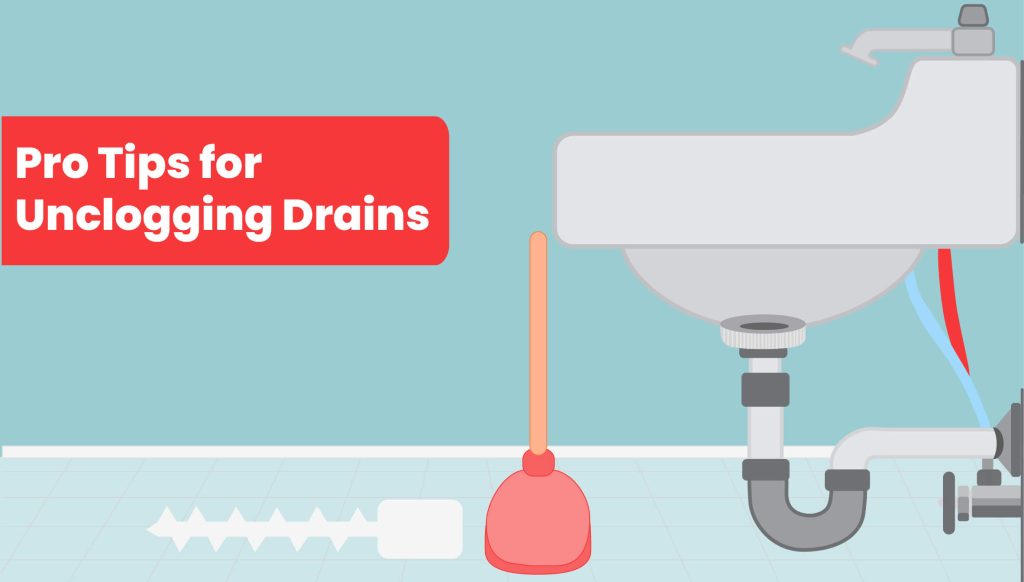
A clogged kitchen sink can be a frustrating problem, but you don’t always need to call a plumber to fix it. In this guide, we will walk you through simple and effective steps to clear a clogged kitchen sink at home. These methods are cost-effective and require minimal tools.
Tools and Materials:
Before you begin, gather the following tools and materials:
- Plunger
- Baking soda
- Vinegar
- Boiling water
- Plumbing snake (optional)
I– A Plunger: The Initial Line of Defense Against Clogged Sinks
When faced with a clogged sink, a plunger is often the first tool homeowners reach for. This trusty device has proven to be highly effective in dislodging blockages and restoring proper drainage. Below, we’ll break down the steps involved in using a plunger to clear a clogged sink and provide insight into its effectiveness and limitations.
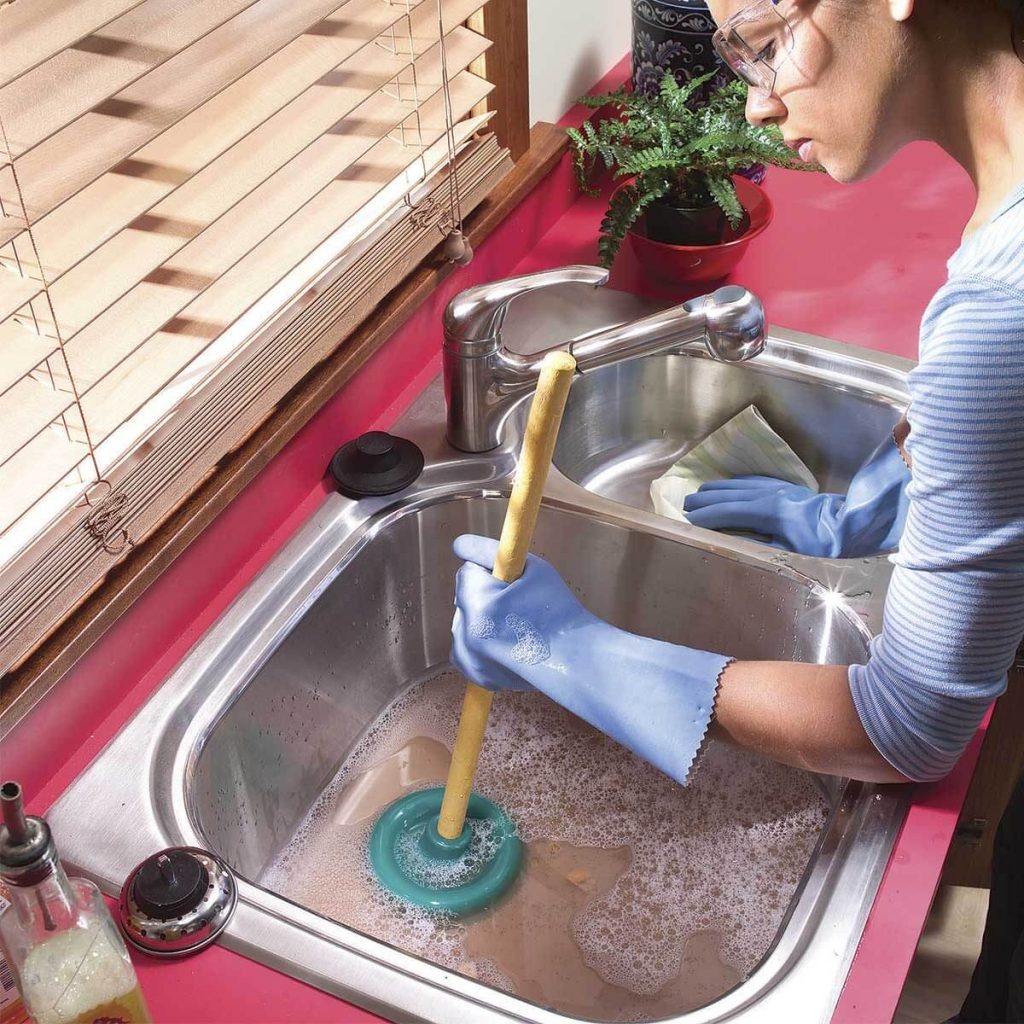
Step 1: Partially Fill the Sink
- Description: Before using the plunger, it’s essential to partially fill the sink with water. This water creates a seal around the plunger, enhancing its effectiveness. In the case of a double sink, where both drains are connected, you should plug the other drain with a rag or stopper to create a seal there as well.
- Analysis: Partially filling the sink serves multiple purposes. Firstly, it creates a barrier between the plunger and the clog, allowing you to generate the necessary suction. Secondly, it helps prevent air from escaping through the overflow hole (if your sink has one), ensuring a better seal and stronger plunging action.
Step 2: Place the Plunger
- Description: Position the plunger over the clogged drain, ensuring that it covers the drain opening completely. Make sure it forms a tight seal to effectively trap air and create a vacuum.
- Analysis: Proper placement of the plunger is critical for the success of this method. The plunger’s rubber cup should be in direct contact with the drain, with no gaps around the edges. This ensures that the air pressure created by the plunging action is directed downward into the drain, increasing the chances of dislodging the clog.
Step 3: Create a Seal
- Description: With the plunger in place, the next step is to create a seal. To do this, press down on the plunger with quick, forceful strokes. The goal is to expel air from the cup and create a vacuum within the drain.
- Analysis: Creating a seal is a crucial aspect of the plunging process. The seal prevents air from entering the drain, allowing the vacuum to form. The forceful strokes push water and air out from the cup and into the drain, building pressure that can dislodge the clog. It’s essential to maintain a good seal throughout the plunging process for optimal results.
Step 4: Repeat
- Description: Continue plunging for about a minute, then remove the plunger and check to see if the water begins to drain. If not, repeat the process a few more times.
- Analysis: Persistence can be key when dealing with stubborn clogs. Repeating the plunging process multiple times can increase the chances of dislodging the blockage. If the water begins to drain, you’ve likely succeeded in clearing the clog. However, if there’s no improvement, it’s time to consider alternative methods.
Effectiveness and Limitations:
The plunger is highly effective for addressing simple clogs, particularly those caused by organic matter like food particles or grease buildup. It’s a practical and cost-effective tool that most homeowners have on hand.
Pros:
- Accessibility: Plungers are readily available and easy to use, making them a convenient choice for quick clog removal.
- Effectiveness: When used correctly, a plunger can successfully dislodge many types of clogs, restoring proper drainage.
- Cost-Effective: Plungers are inexpensive and provide a cost-effective solution for minor clogs.
Cons:
- Limited to Certain Clogs: Plungers are most effective for simple clogs caused by organic matter. They may not work well on more complex or solid blockages.
- Physical Exertion: Plunging can be physically demanding, requiring some effort and stamina.
- No Guarantee of Success: While a plunger is a valuable tool, it may not work for all clogs. In cases of severe or deep blockages, other methods may be necessary.
The plunger is a valuable and widely used tool for addressing clogged sinks. It is often the first line of defense when dealing with common clogs in kitchen and bathroom sinks. Proper use of the plunger, including creating a seal, is vital for its effectiveness. While it’s not a one-size-fits-all solution, it is an essential tool for homeowners and can successfully clear many types of minor sink blockages. If the plunger does not resolve the issue, it may be time to explore more advanced methods or seek professional assistance.
II- Use Baking Soda and Vinegar – A Natural Approach to Unclogging Drains
When dealing with a clogged sink, using baking soda and vinegar is a natural and chemical-free method that can effectively break down organic materials causing the clog. This approach is not only eco-friendly but can often clear minor blockages without resorting to harsh chemicals or plumbing tools. In this section, we will break down each step of this method and provide a comprehensive analysis of its effectiveness.

Step 1: Pour 1/2 Cup of Baking Soda Down the Drain
- Description: The first step in using baking soda and vinegar to clear a clogged drain is to pour 1/2 cup of baking soda down the affected drain.
- Analysis: Baking soda, or sodium bicarbonate, is a mild abrasive substance that can help break down and dislodge clogs. It’s also effective at absorbing odors. By introducing baking soda into the drain, you’re laying the foundation for the chemical reaction that will aid in unclogging the sink.
Step 2: Follow with 1/2 Cup of Vinegar
- Description: After adding baking soda, the next step is to follow it with 1/2 cup of vinegar. Typically, white distilled vinegar is used for this purpose.
- Analysis: Vinegar, particularly white vinegar, is acidic in nature. When combined with baking soda, which is a base, a chemical reaction occurs. This reaction creates bubbles and fizz, which can help break down and dislodge the clog. The fizzing action is a sign that the reaction is taking place.
Step 3: Cover the Drain
- Description: Once you’ve added the vinegar, quickly cover the drain with a plug, a cloth, or any suitable cover to keep the foaming action contained within the drain.
- Analysis: Covering the drain is essential to focus the reaction’s energy on the clog. It prevents the fizzing action from escaping through the sink or overflow hole, concentrating its force on the blockage. This ensures that the chemical reaction is more likely to dislodge the clog.
Step 4: Wait for About 30 Minutes
- Description: After covering the drain, it’s crucial to allow the baking soda and vinegar mixture to work. Wait for approximately 30 minutes to ensure that the chemical reaction has had time to break down the clog.
- Analysis: The waiting period is an important aspect of this method. It gives the baking soda and vinegar sufficient time to react with the clog, weaken it, and start breaking it down. For stubborn clogs, extending this waiting time may be beneficial.
Step 5: Uncover the Drain and Flush with Hot Water
- Description: After the waiting period, uncover the drain and flush it with hot water. Hot water helps wash away the dislodged clog and the residue of the baking soda and vinegar mixture.
- Analysis: Flushing the drain with hot water is the final step of this method. The hot water carries away the broken-down materials, effectively clearing the clog. The hot water also helps ensure that any remaining baking soda or vinegar residue is washed away, preventing it from forming a new clog.
Effectiveness and Limitations:
The baking soda and vinegar method is most effective for addressing minor clogs caused by organic matter, soap scum, or grease buildup. It offers several advantages:
Pros:
- Environmentally Friendly: This method avoids the use of harsh chemicals, making it an eco-friendly choice.
- Safe for Pipes: It’s generally safe for most types of pipes and plumbing fixtures.
- Cost-Effective: Baking soda and vinegar are readily available and inexpensive.
Cons:
- Limited to Certain Clogs: It may not be effective for severe or solid blockages.
- Chemical Reaction May Not Work for All Clogs: The success of this method depends on the reaction between the baking soda and vinegar, which may not be sufficient for some clogs.
- Requires Patience: Waiting for the chemical reaction to work may not be suitable for those seeking immediate results.
The baking soda and vinegar method is a natural and environmentally friendly approach to unclogging drains. It can be highly effective for minor clogs caused by organic materials, soap scum, or grease buildup. When used correctly, this method can be a cost-effective and safe alternative to chemical drain cleaners. However, its effectiveness may vary depending on the nature and severity of the clog. For more stubborn or complex blockages, additional methods or professional plumbing assistance may be necessary.
III- Boiling Water – A Simple and Effective Method for Unclogging Drains
Boiling water is a classic, straightforward, and often surprisingly effective method to address clogs in drains. This simple approach is particularly useful for dislodging and flushing away clogs caused by grease and soap buildup. In this section, we will explore each step of using boiling water to clear a clogged drain and provide a comprehensive analysis of its effectiveness and potential limitations.

Step 1: Boil a Kettle or Pot of Water
- Description: The first step in this method is to bring water to a rolling boil. You can use a kettle or a pot to boil water, depending on what’s more convenient for you.
- Analysis: Boiling water is a readily available resource, making this method accessible to nearly everyone. The high temperature of the boiling water can be effective in breaking down and dislodging clogs caused by substances like grease, soap, and other organic matter. The boiling water’s thermal energy is key to its success in unclogging drains.
Step 2: Carefully Pour the Boiling Water Down the Drain in Two to Three Stages
- Description: After the water reaches a rolling boil, carefully pour it down the clogged drain. It’s essential to perform this step gradually, in two to three stages, rather than all at once.
- Analysis: Pouring the boiling water in stages has several advantages. First, it reduces the risk of splashing, which can be hazardous. Second, it allows the hot water to work its way down the drain gradually, increasing its contact time with the clog. The hot water’s heat energy can help soften and dissolve the clog, making it easier to dislodge.
Step 3: Let the Hot Water Work for a Few Minutes
- Description: After pouring the boiling water, it’s crucial to let it work for a few minutes. The heat energy from the water will continue to act on the clog during this time.
- Analysis: Allowing the hot water to work is an essential part of the process. The heat softens the clog’s components, particularly substances like grease and soap that may have congealed and adhered to the pipe walls. The hot water can also create pressure behind the clog, helping to push it along the drain.
Step 4: Be Cautious with PVC Pipes
- Description: It’s important to be cautious when using this method on drains with PVC (polyvinyl chloride) pipes. Very hot water can potentially damage PVC pipes.
- Analysis: PVC pipes are commonly used in plumbing, particularly in newer constructions. While PVC is a durable material, it may not withstand extremely hot water, which can soften and distort it. If you have PVC pipes, it’s advisable to use hot but not boiling water.
Effectiveness and Limitations:
Boiling water is an effective method for addressing clogs caused by grease and soap buildup, which are common culprits in kitchen sink clogs. This method offers several advantages:
Pros:
- Accessibility: Boiling water is readily available in most homes, making it a convenient option.
- Chemical-Free: It does not rely on chemicals, which can be a concern for people who prefer natural and eco-friendly methods.
- Cost-Effective: Boiling water is a low-cost solution.
Cons:
- Limited to Certain Clogs: This method is most effective for specific types of clogs, such as those caused by grease and soap. It may not work well on solid blockages.
- Potential for PVC Pipe Damage: If your plumbing system includes PVC pipes, using very hot water may not be suitable, as it can damage the pipes.
- Safety Concerns: Pouring boiling water can be hazardous if not done carefully, with a risk of splashing and burns.
Using boiling water to unclog drains is a simple and cost-effective method that can effectively address specific types of clogs, particularly those caused by grease and soap buildup. The hot water’s thermal energy softens and breaks down the clog, allowing it to be flushed away. While this method has its advantages, it may not be suitable for all types of clogs, and precautions should be taken when dealing with PVC pipes. As with any unclogging method, its effectiveness can vary depending on the specific nature and severity of the clog. If boiling water doesn’t clear the clog, exploring other methods or seeking professional plumbing assistance may be necessary.
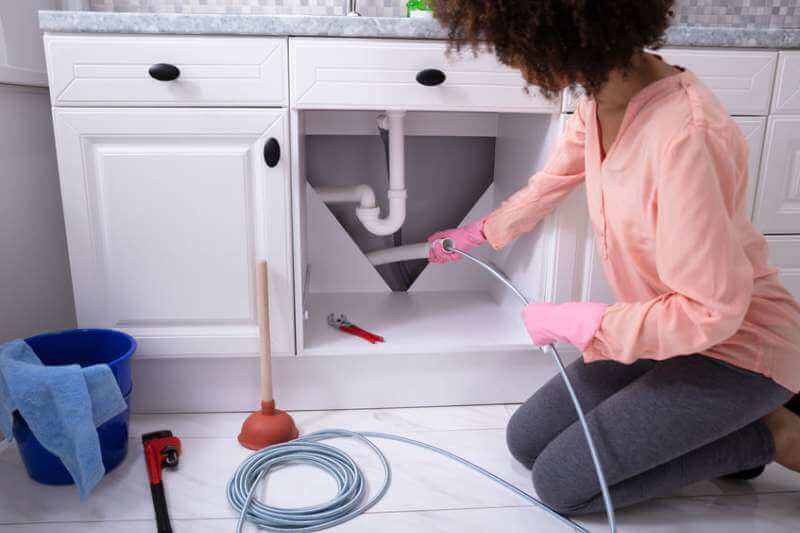
IV- Use a Plumbing Snake (Optional) – A Powerful Tool for Stubborn Clogs
When dealing with a stubborn clog that resists more straightforward methods, a plumbing snake, also known as an auger, can be a powerful tool to help dislodge and clear the obstruction. This tool is especially useful for reaching and breaking up clogs deep within the drainpipes. In this section, we will examine each step of using a plumbing snake to clear a clogged drain and provide a comprehensive analysis of its effectiveness and potential limitations.
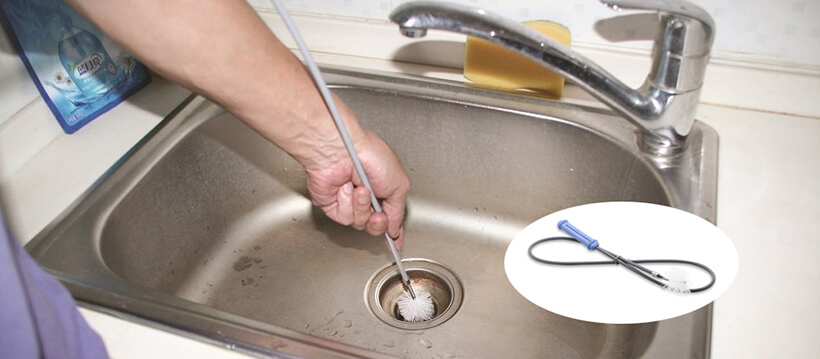
Step 1: Insert the Snake into the Drain
- Description: The first step in using a plumbing snake is to insert it into the drain. To do this, you’ll need to push the snake down the drain while turning the handle clockwise. The goal is to advance the snake into the pipe until you encounter resistance.
- Analysis: Inserting the snake requires both physical effort and precision. The clockwise turning motion helps the snake navigate the twists and turns of the pipe. Resistance is an indication that you’ve likely reached the clog. It’s essential to have patience during this process and not force the snake too aggressively, as you could risk damaging the pipes.
Step 2: Turn the Snake Counterclockwise
- Description: After encountering resistance and reaching the clog, the next step is to turn the snake counterclockwise. This motion is intended to break up or hook onto the clog.
- Analysis: The counterclockwise turning motion is designed to engage with the clog. By rotating the snake in the opposite direction, you can work on dislodging the blockage. The snake’s flexible cable and attachments are particularly effective at gripping or breaking apart the clog, depending on the type and composition of the obstruction.
Step 3: Withdraw the Snake Carefully
- Description: Once you’ve worked on the clog, and you believe it’s been dislodged or sufficiently broken up, carefully withdraw the snake from the drain.
- Analysis: Removing the snake requires careful handling to prevent damage to the pipes and to ensure the clog comes out with the snake. This step can be critical in assessing whether you’ve successfully cleared the clog. Inspect the end of the snake for any debris or evidence of the obstruction.
Effectiveness and Limitations:
A plumbing snake is an effective tool for addressing stubborn clogs, particularly those that are deep within the drainpipes. This method offers several advantages:
Pros:
- Versatility: Plumbing snakes come in various lengths and styles, making them adaptable to different types of clogs and drain configurations.
- Highly Effective: Plumbing snakes are adept at engaging with and dislodging a wide range of clogs, including solid obstructions.
- Preserves Pipes: When used correctly, plumbing snakes are less likely to damage pipes compared to some other methods.
Cons:
- Complexity: Using a plumbing snake can be more complex and requires some skill. It’s not recommended for individuals unfamiliar with plumbing tools.
- Potential for Pipe Damage: While generally less likely to damage pipes compared to chemicals, using a plumbing snake incorrectly can still lead to plumbing damage.
- Professional Assistance: For extremely challenging clogs or complex plumbing systems, it may be necessary to consult a professional plumber.
A plumbing snake is a potent tool for tackling stubborn clogs that resist simpler methods. Its versatility and effectiveness make it a go-to option for many homeowners when dealing with particularly challenging obstructions. The key to success with a plumbing snake lies in correct use and careful handling. It’s essential to have a good understanding of the plumbing system and the nature of the clog you’re addressing. While a plumbing snake can be highly effective, it’s not suitable for everyone, and those who are not experienced with plumbing tools should exercise caution or consider professional assistance for complex clogs or intricate plumbing systems.
Certainly, here’s a detailed analysis of “Step 5: Repeat and Prevent” in the context of clearing clogged drains:
V- Repeat and Prevent – Ensuring Clear Drains and Preventing Future Clogs
After attempting one or more methods to clear a clogged drain, it’s essential to evaluate the results. Sometimes, a single attempt may not fully clear the obstruction, especially if it’s a stubborn or complex clog. In such cases, repetition or combining methods may be necessary. Furthermore, taking proactive steps to prevent future blockages is crucial for maintaining clear drains and a properly functioning plumbing system. This section delves into the analysis of these final steps in the process of dealing with clogs.
Repeat the Steps
- Description: If the initial attempt at unclogging the drain is not completely successful, repeating the above methods is a logical course of action. Whether you’ve used a plunger, baking soda and vinegar, boiling water, or a plumbing snake, you may need to repeat these steps to further address the clog.
- Analysis: Clogs can vary in complexity and stubbornness. A minor clog may respond well to a single attempt, while a more challenging one may require multiple passes with the same or different methods. It’s essential to be patient and persistent when repeating the process. When doing so, consider using a different approach or a combination of methods to address the clog more effectively. For example, if baking soda and vinegar alone didn’t work, try using a plunger before or after this chemical-free method.
Prevent Future Blockages
- Description: Once the clog is successfully cleared, it’s crucial to take steps to prevent future blockages. This proactive approach helps maintain clear drains and ensures the plumbing system’s proper functioning.
- Analysis: Preventing future blockages is an essential aspect of maintaining your plumbing system and minimizing the need for unclogging. Here are some practical preventive measures:
- Regularly flush the drain with hot water: Periodic flushing with hot water can help wash away grease, soap scum, and minor debris that may accumulate in the pipes over time. It’s a simple yet effective preventive measure to maintain clear drains.
- Use a sink strainer to catch food particles: In kitchen sinks, a sink strainer is a valuable tool that traps food particles, preventing them from entering the drain. This reduces the likelihood of food-related clogs.
- Avoid pouring grease down the sink: Grease can solidify and adhere to the interior of pipes, creating blockages. Dispose of grease properly by allowing it to cool and solidify in a container before disposal.
Effectiveness and Limitations:
The effectiveness of repeating the steps to clear a clog depends on the specific nature of the clog, its location, and the methods used. For preventive measures, their success largely depends on consistent implementation and maintenance:
Pros:
- Adaptability: Repeating or combining methods can be tailored to the clog’s characteristics, making it an adaptable approach.
- Preventive Measures: Implementing preventive steps is a proactive way to maintain clear drains and prevent future clogs.
- Cost-Effective: Preventive measures are typically low-cost and do not require specialized tools or chemicals.
Cons:
- Persistence Required: Clearing a stubborn clog may necessitate multiple attempts and persistence.
- Effectiveness Variation: The success of preventive measures depends on regular implementation, and their effectiveness may vary based on usage patterns.
- Not a Guarantee: Despite preventive efforts, clogs may still occur due to factors beyond your control.
The final step in dealing with clogs involves evaluating the effectiveness of your initial clog-clearing methods and taking steps to prevent future blockages. If the clog persists, repeating the process or using a combination of methods is a practical approach to address the issue. For preventive measures, regular maintenance is key to keeping drains clear and minimizing the need for unclogging. While these methods and practices are effective in many cases, it’s important to recognize that clogs may still occur due to various factors. In such instances, persistence and an understanding of the specific plumbing issue are valuable for effectively managing and maintaining your plumbing system.
Conclusion:
Clearing a clogged kitchen sink at home can often be achieved using simple, cost-effective methods. By following these steps and using the right tools, you can save both time and money, and keep your kitchen sink flowing smoothly. If the clog persists despite your efforts, or if you’re uncomfortable with these techniques, it’s advisable to consult a professional plumber.