10 Types of Stains on the Floor and How to Remove Them
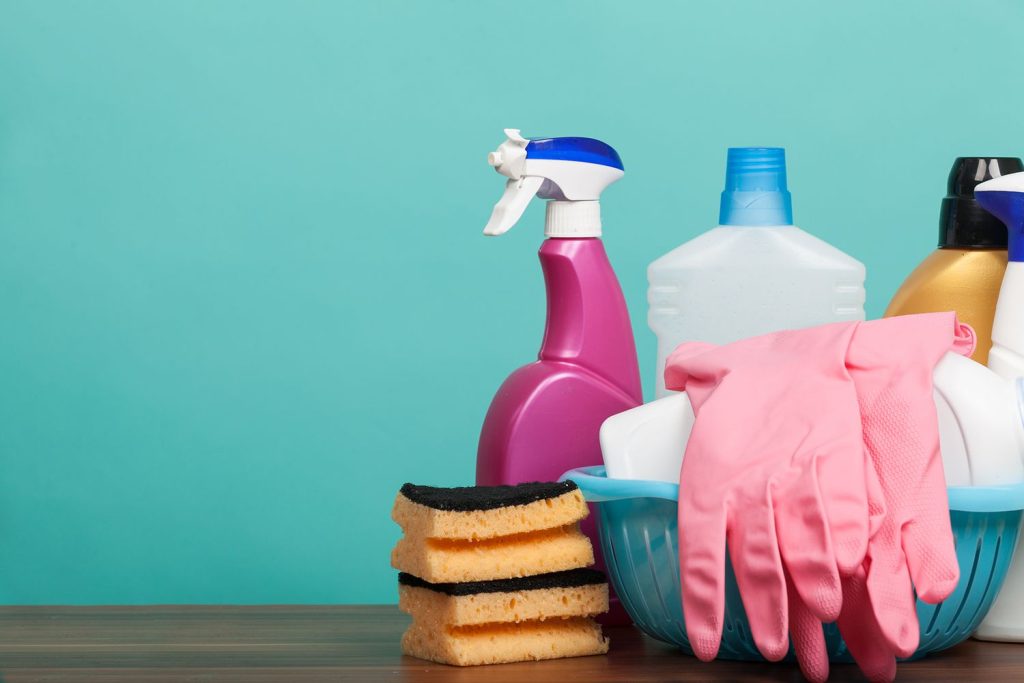
Pride in a clean and fresh home is important, but sometimes, stains on the floor can appear and become a nuisance. Below is a detailed guide on 10 common types of stains on the floor and how to remove them. To execute these methods, please ensure they are suitable for your floor type and perform a test on a small, inconspicuous area to ensure the safety of your floor.
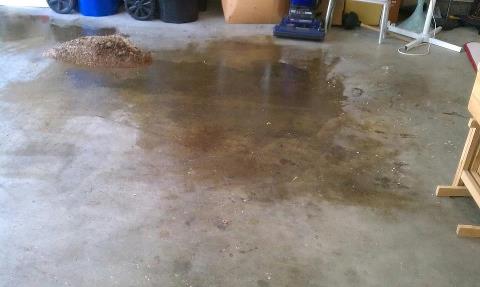
1. Oil and Grease Stains
Stains caused by oil and grease are often common issues when it comes to cleaning floors. They can result from cooking, oily residues from shoes, or various other situations. Removing these stains can sometimes be challenging, but there are effective and straightforward methods to address this problem.
Method 1: Using Bran or Cornstarch
Bran and cornstarch both work well for cleaning oil and grease stains on floors. Bran is typically a good choice for non-slip or hardwood floors, while cornstarch is suitable for smoother surfaces like tiles.
- Moisten the Stained Area: Use warm water or slightly hotter than lukewarm water to moisten the stained area.
- Sprinkle Bran or Cornstarch on the Stain: Sprinkle an adequate amount of bran or cornstarch onto the stain, ensuring it covers the entire area.
- Cool and Wait: Allow the bran or cornstarch to come into contact with the oil and grease for at least 15-30 minutes. As time passes, these materials will absorb the oil and grease.
- Clean the Stain: Use a piece of cloth or a soft-bristle brush to wipe off the bran or cornstarch along with the absorbed oil and grease. You may need to repeat this a few times until the stain is completely gone.
Method 2: Warm Water and Soap
If the oil and grease stain is not too severe, you can use warm water and soap to clean it.
- Create a Soap Solution: Mix a small amount of soap with warm water to create a diluted solution.
- Moisten the Stained Area: Wet the stained area with warm water.
- Apply the Soap Solution: Use a soft brush or a clean cloth soaked in the soap solution and apply it to the stain.
- Clean the Stain: Gently scrub the stain with the soft brush. Avoid applying too much pressure to prevent damage to the floor’s surface.
- Rinse with Warm Water: Use warm water to thoroughly rinse the stained area and the soap. Make sure to remove all the soap to prevent the creation of new stains.
Method 3: White Vinegar and Warm Water
White vinegar is also an effective method for removing oil and grease stains.
- Prepare a White Vinegar Solution: Mix equal parts white vinegar and warm water to create a diluted solution.
- Moisten the Stained Area: Wet the stained area with warm water.
- Apply the White Vinegar Solution: Use a soft brush or a clean cloth soaked in the white vinegar solution and apply it to the stain.
- Clean the Stain: Gently scrub the stain with the soft brush. White vinegar has antibacterial properties and can also help eliminate the smell of oil and grease.
- Rinse with Warm Water: Use warm water to thoroughly rinse the stained area and the vinegar solution. Then, dry the area.
When removing oil and grease stains from your floor, always remember to check the manufacturer’s instructions and perform a small test in a discreet area before applying the method to ensure it is safe for your floor type. This ensures that your floors always maintain their cleanliness and freshness.
2. Water and Beverage Stains
Water and beverage stains are a common issue in households and often result from accidental spills or drips from glasses and containers. These stains can leave unsightly marks on your floors, whether they are hardwood, tile, or carpet. In this in-depth analysis, we will explore effective methods for removing water and beverage stains from your floors, leaving them looking clean and refreshed.
Method 1: Blotting and Water
One of the easiest methods to remove water and beverage stains is by blotting with water. This method is suitable for stains that are still fresh and haven’t had time to set.
- Act Quickly: The key to success with this method is to act quickly. As soon as you notice the spill, grab a clean cloth or paper towel.
- Blot the Stain: Gently blot the stained area with the clean cloth or paper towel. Do not rub or scrub, as this can spread the stain and damage the floor.
- Repeat if Necessary: Depending on the severity of the stain, you may need to repeat the blotting process several times until the stain is gone.
- Rinse with Water: After the stain is removed, rinse the area with clean water to ensure no residue is left behind. Dry the area thoroughly.
Method 2: Water and Dish Soap
For water and beverage stains that are a bit more stubborn, a mixture of water and dish soap can be highly effective.
- Prepare a Soapy Solution: In a container, mix a few drops of mild dish soap with warm water to create a soapy solution.
- Moisten the Stained Area: Wet the stained area with warm water.
- Apply the Soapy Solution: Using a soft cloth or sponge, apply the soapy solution to the stain.
- Gently Scrub the Stain: Gently scrub the stain with the cloth or sponge. Avoid using excessive force to prevent damage to the floor’s surface.
- Rinse with Water: After successfully removing the stain, rinse the area with clean water to remove any soap residue.
- Dry the Area: Thoroughly dry the area to prevent slips and to ensure no new stains form.
Method 3: Vinegar and Water
White vinegar can be an effective solution for removing water and beverage stains, especially on hardwood or tile floors.
- Create a Vinegar Solution: Mix equal parts of white vinegar and warm water in a container.
- Moisten the Stained Area: Wet the stained area with the vinegar solution.
- Apply the Vinegar Solution: Use a soft cloth or sponge soaked in the vinegar solution to apply it to the stain.
- Gently Scrub the Stain: Gently scrub the stain with the cloth or sponge. White vinegar also helps eliminate odors caused by the stains.
- Rinse with Water: After removing the stain, rinse the area with clean water to remove any vinegar residue.
- Dry the Area: Ensure the area is completely dry to avoid any potential damage or new stains.
Method 4: Commercial Stain Removers
For stubborn or old water and beverage stains, you may consider using a commercial stain remover designed for your specific floor type. Be sure to follow the manufacturer’s instructions and test the product on an inconspicuous area first.
Method 5: Professional Cleaning Services
If the stain persists and you’re unsure about removing it yourself, consider hiring a professional cleaning service. They have the expertise and specialized equipment to tackle tough stains effectively.
When dealing with water and beverage stains, it’s crucial to address them promptly to prevent permanent damage or discoloration to your floors. Regular cleaning and maintenance can help ensure your floors stay looking clean and free of stains.

3. Stubborn Shoe Scuffs
Stubborn shoe scuffs are a common issue that can mar the appearance of your floors. These marks are often caused by shoes with dark or rubber soles, and they can be especially noticeable on light-colored or hardwood floors. Removing these scuffs can be a bit challenging, but there are effective methods to tackle them, leaving your floors looking clean and blemish-free.
Method 1: Using an Eraser
One of the easiest and most effective ways to remove stubborn shoe scuffs is by using a simple eraser. This method is particularly useful for scuffs on hardwood or laminate floors.
- Select a Clean Eraser: Ensure you have a clean and non-abrasive eraser, such as a white eraser or an art gum eraser.
- Rub the Scuff: Gently rub the eraser over the scuff mark in a back-and-forth motion. Apply slight pressure, but avoid excessive force to prevent damage to the floor’s finish.
- Wipe Away Residue: As you work, you may notice the scuff mark transferring onto the eraser. Wipe the eraser clean and continue rubbing until the scuff is completely removed.
- Clean the Area: Once the scuff is gone, wipe the area with a damp cloth to remove any eraser residue.
Method 2: Baking Soda and Water
Baking soda is a versatile and gentle abrasive that can be used to remove shoe scuffs on various floor types.
- Create a Baking Soda Paste: Mix a small amount of baking soda with water to create a thick paste.
- Apply the Paste: Apply the baking soda paste to the scuff mark using a soft cloth or sponge.
- Gently Scrub the Scuff: Gently scrub the scuff mark with the baking soda paste. The mild abrasive action will help lift the scuff.
- Wipe Clean: Wipe the area clean with a damp cloth, removing any remaining baking soda residue.
Method 3: Commercial Scuff Removers
If the scuff mark is particularly stubborn or the methods above do not yield satisfactory results, consider using a commercial scuff remover specifically designed for your floor type. Always follow the manufacturer’s instructions and perform a test on a hidden area before using the product on the scuff.
Method 4: Magic Erasers
Magic Erasers are a cleaning product designed to tackle tough stains, including scuff marks. These erasers contain micro-abrasive cleaning agents that can effectively remove scuffs from various floor surfaces.
- Wet the Magic Eraser: Moisten the Magic Eraser with water to activate the cleaning agents.
- Gently Rub the Scuff: Use the damp Magic Eraser to gently rub the scuff mark. Apply consistent but not excessive pressure.
- Wipe Clean: Wipe the area clean with a damp cloth or paper towel to remove any eraser residue.
Method 5: Professional Cleaning Services
For scuff marks that are deeply embedded or if you’re uncertain about removing them yourself, it’s advisable to seek the services of professional cleaning experts who have the experience and tools to effectively eliminate stubborn scuffs.
Dealing with stubborn shoe scuffs requires patience and the right approach. The methods mentioned above should help restore the pristine appearance of your floors, ensuring they remain blemish-free and looking their best.

4. Pineapple and Food Stains
Pineapple and food stains are common culprits in households, often leaving behind unsightly marks on floors and surfaces. These stains can result from accidental spills, especially if not promptly attended to. Removing pineapple and food stains can be a bit challenging due to their potential to cause discoloration and stubborn residues. In this detailed analysis, we will explore effective methods for tackling pineapple and food stains, ensuring your floors and surfaces remain clean and pristine.
Method 1: Blotting and Water
One of the simplest and most effective methods for addressing pineapple and food stains is blotting with water. This method is suitable for fresh stains and is especially effective on non-porous surfaces.
- Act Quickly: Speed is of the essence with this method. As soon as you notice the stain, grab a clean cloth or paper towel.
- Blot the Stain: Gently blot the stained area with the clean cloth or paper towel. Avoid rubbing or scrubbing, as this can spread the stain and push it further into the surface.
- Repeat if Necessary: Depending on the severity of the stain, you may need to repeat the blotting process several times until the stain is completely gone.
- Rinse with Water: After successfully removing the stain, rinse the area with clean water to ensure no residue remains. Dry the area thoroughly.
Method 2: Soapy Water
For stubborn pineapple and food stains, a mixture of warm water and mild dish soap can be highly effective.
- Prepare a Soapy Solution: In a container, mix a few drops of mild dish soap with warm water to create a soapy solution.
- Moisten the Stained Area: Wet the stained area with warm water.
- Apply the Soapy Solution: Use a soft cloth or sponge to apply the soapy solution to the stain.
- Gently Scrub the Stain: Gently scrub the stain with the cloth or sponge. Avoid using excessive force to prevent damage to the surface.
- Rinse with Water: After removing the stain, rinse the area with clean water to remove any soap residue.
- Dry the Area: Ensure the area is thoroughly dry to prevent new stains and to avoid slipping.
Method 3: Vinegar and Water
White vinegar is also a versatile solution for tackling pineapple and food stains. It is particularly effective for non-porous surfaces like tiles.
- Create a Vinegar Solution: Mix equal parts of white vinegar and warm water in a container.
- Moisten the Stained Area: Wet the stained area with the vinegar solution.
- Apply the Vinegar Solution: Use a soft cloth or sponge soaked in the vinegar solution to apply it to the stain.
- Gently Scrub the Stain: Gently scrub the stain with the cloth or sponge. The vinegar’s acidity helps break down stains and eliminate odors.
- Rinse with Water: After successfully removing the stain, rinse the area with clean water to remove any vinegar residue.
- Dry the Area: Ensure the area is completely dry to prevent potential damage and new stains.
Method 4: Commercial Stain Removers
For persistent or old pineapple and food stains, consider using a commercial stain remover designed for your specific surface type. Always follow the manufacturer’s instructions and conduct a test in an inconspicuous area to ensure the product is safe for your surface.
Method 5: Professional Cleaning Services
If the stain proves too stubborn to remove or if you are unsure about tackling it yourself, it is advisable to seek professional cleaning services. Experts have the knowledge and specialized equipment to effectively address tough stains and restore the cleanliness of your surfaces.
Dealing with pineapple and food stains demands prompt action and the appropriate methods. Following the recommendations provided above will help ensure your floors and surfaces remain clean, free of stains, and looking their best.

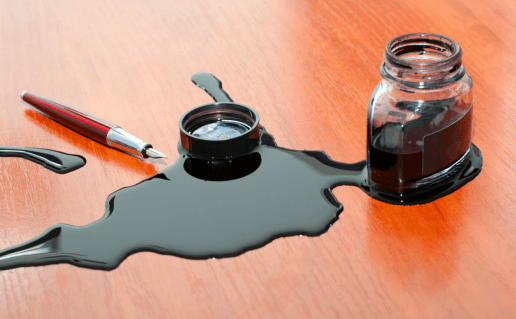
5. Pen Ink Stains
Pen ink stains are a common nuisance in homes and offices, often leaving unsightly marks on various surfaces. These stains can occur when a pen leaks, bursts, or accidentally comes into contact with a surface, such as fabric, clothing, or walls. Removing pen ink stains can be tricky, but with the right approach and effective methods, you can restore surfaces to their pristine condition. In this detailed analysis, we will explore various techniques to eliminate pen ink stains from different surfaces, ensuring they remain clean and blemish-free.
Method 1: Rubbing Alcohol
Rubbing alcohol is a powerful and effective solution for removing pen ink stains from various surfaces, including fabrics, leather, and hard surfaces.
- Test on an Inconspicuous Area: Before applying rubbing alcohol to the stained area, test it on a small, inconspicuous spot to ensure it doesn’t cause any damage or discoloration.
- Apply Rubbing Alcohol: Dampen a clean, white cloth or cotton ball with rubbing alcohol.
- Blot the Stain: Gently blot (do not rub) the stained area with the cloth or cotton ball. This will help lift the ink stain.
- Change Cloth Frequently: As the cloth or cotton ball becomes saturated with ink, replace it with a fresh one to avoid spreading the stain.
- Continue Blotting: Repeat the blotting process until the ink stain is no longer visible.
- Rinse and Dry: Rinse the area with water to remove any residual rubbing alcohol, and then pat it dry.
Method 2: Hairspray
Hairspray can be a surprisingly effective solution for removing pen ink stains, especially from fabric surfaces.
- Test on an Inconspicuous Area: As with any stain removal method, test hairspray on a small, inconspicuous spot to ensure it doesn’t cause damage or discoloration.
- Spray the Stain: Apply hairspray directly to the ink stain, ensuring it is thoroughly covered.
- Blot the Stain: Using a clean cloth or paper towel, gently blot the stained area. The hairspray should start to dissolve the ink.
- Repeat as Necessary: Depending on the size and severity of the stain, you may need to repeat the process a few times until the ink is fully removed.
- Wash Fabric: If the stained item is fabric, wash it as usual after treating to remove any residual hairspray.
Method 3: Commercial Stain Removers
Commercial stain removers formulated to remove ink stains can be highly effective and convenient.
- Select the Appropriate Product: Choose a commercial stain remover designed for the specific surface you need to treat, whether it’s fabric, upholstery, or hard surfaces.
- Follow Manufacturer’s Instructions: Read and follow the manufacturer’s instructions carefully. Some products may require specific application techniques.
- Perform a Spot Test: Before treating the entire stain, conduct a spot test to ensure the product is safe for your surface.
- Apply and Rinse: Apply the stain remover according to the instructions. After the ink is removed, rinse the area and dry it as needed.
Method 4: Professional Cleaning Services
For stubborn or extensive pen ink stains, or if you are unsure about tackling them yourself, consider seeking professional cleaning services. Experts have the expertise and specialized equipment to effectively remove stubborn ink stains and restore surfaces to their original condition.
Dealing with pen ink stains requires attention and the right approach. Using the methods mentioned above, you can effectively eliminate ink stains from a variety of surfaces, ensuring they remain clean, blemish-free, and looking their best.
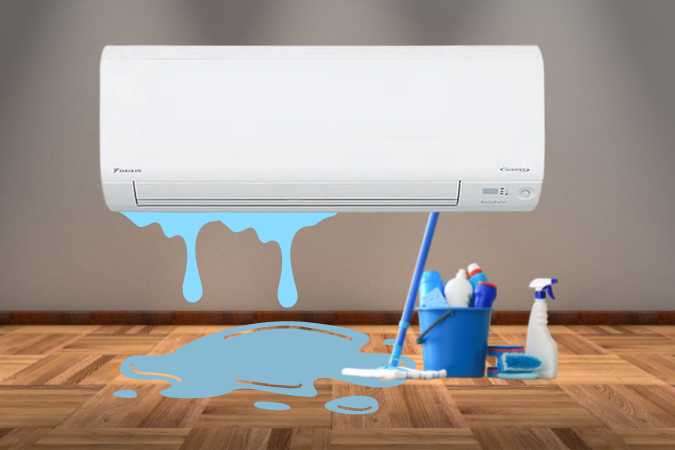
6. Air Conditioner Water Leaks
Water leaks from air conditioners can be a common issue, particularly in warmer months when these cooling systems are used extensively. These leaks can lead to unsightly water stains and potential damage to the surrounding area. It’s crucial to address these issues promptly to prevent further complications. In this comprehensive analysis, we will explore effective methods for removing water stains caused by air conditioner leaks, ensuring your surfaces remain clean and undamaged.
Method 1: Identifying the Source
Before addressing the water stains, it’s essential to identify and resolve the source of the air conditioner leak. This may involve checking for clogged or damaged drainage lines, a full condensate pan, or a refrigerant leak. Once the source is fixed, you can prevent further water stains.
Method 2: Removing Water Stains
After fixing the source of the leak, it’s time to tackle the water stains left behind. The approach will depend on the surface type.
For Ceilings and Walls:
- Assess the Damage: Determine the extent of the water damage on your ceiling or wall. If it’s a minor stain, you may be able to address it yourself.
- Use a Stain-Sealing Primer: Apply a stain-sealing primer to the stained area. This will prevent the water stain from bleeding through when you paint over it.
- Repaint: Once the primer has dried, repaint the affected area with matching paint. This should cover the water stain and restore the appearance of the surface.
For Carpets and Floors:
- Blot the Area: If the water leak has affected your carpet or floor, begin by blotting the area with a clean, dry cloth to absorb as much moisture as possible.
- Use a Commercial Carpet Cleaner: For carpets, you may need to use a commercial carpet cleaner to treat the stain. Follow the manufacturer’s instructions and ensure thorough rinsing and drying.
- Hard Floor Cleaning: If the stain is on a hard floor, clean the area with a mixture of warm water and mild dish soap. Ensure the area is rinsed and dried thoroughly to prevent any water stains from returning.
Method 3: Preventing Future Stains
To avoid dealing with water stains caused by air conditioner leaks in the future, consider the following preventive measures:
- Regular Maintenance: Schedule regular maintenance for your air conditioning system, including cleaning and inspecting the condensate drain line.
- Install a Drain Pan Alarm: Installing a drain pan alarm can alert you to any water accumulation in the condensate pan, giving you an early warning of potential leaks.
- Clean Air Filters: Keep air filters clean to ensure proper airflow and reduce the risk of the evaporator coil freezing and causing leaks.
- Redirect Drain Lines: Ensure that drain lines are properly directed away from your home to prevent water from seeping into walls or ceilings.
- Use a Dehumidifier: In humid climates, using a dehumidifier can help reduce the amount of moisture in the air and minimize condensation.
- Consider a Secondary Drain Pan: Installing a secondary drain pan under your air conditioner can catch any potential leaks and prevent water from reaching your ceilings or floors.
Addressing water stains caused by air conditioner leaks may involve both immediate cleanup and long-term prevention. By following these methods, you can effectively remove existing stains, restore the affected areas, and ensure your home remains clean and free of water-related damage.
7. Paint Spill Stains
Paint spills can happen during DIY projects, renovations, or accidents. These spills can result in unsightly paint stains on various surfaces. Addressing paint spill stains requires a different approach based on the surface and the type of paint involved. In this comprehensive analysis, we will explore effective methods for removing paint spill stains, ensuring your surfaces remain clean and free of blemishes.
Method 1: Identifying the Paint Type
Before tackling a paint spill stain, it’s crucial to identify the type of paint involved. The most common types are water-based (latex) paint and oil-based paint. The approach will vary based on the paint type.
Method 2: Water-Based (Latex) Paint
For Painted Walls and Ceilings:
- Act Quickly: If the paint spill is still wet, act quickly. Use a clean, damp cloth to blot and gently lift the paint without spreading it. Do not rub.
- Rinse with Water: After blotting, rinse the area with water to remove any remaining paint. Dry the area with a clean cloth.
- Paint Over: If the paint has dried, you may need to touch up the area with matching paint. Sand any rough spots and apply a fresh coat, blending it with the existing paint.
For Hard Floors and Hard Surfaces:
- Scrape Excess Paint: Carefully scrape excess dried paint with a putty knife. Avoid scratching the surface.
- Use a Paint Remover: Apply a latex paint remover to the stain. Follow the manufacturer’s instructions and ensure thorough rinsing and drying after the stain is removed.
For Fabric or Carpet:
- Blot Excess Paint: Blot the stain with a clean cloth to remove excess paint. Do not rub, as this can spread the paint.
- Use Rubbing Alcohol: Dampen a cloth with rubbing alcohol and gently blot the stain. Test a small, inconspicuous area first to ensure the alcohol does not harm the fabric.
- Wash Fabrics: For fabrics, launder the item according to the care label instructions after treating the stain.
Method 3: Oil-Based Paint
For Painted Walls and Ceilings:
- Act Quickly: If the paint spill is still wet, act quickly. Use a clean, damp cloth to blot and gently lift the paint without spreading it. Do not rub.
- Use a Solvent: Apply a paint thinner or mineral spirits to a clean cloth, then blot the paint spill. Be cautious when using solvents and ensure proper ventilation.
- Rinse with Water: After removing the paint, rinse the area with water and dry it with a clean cloth.
For Hard Floors and Hard Surfaces:
- Scrape Excess Paint: Carefully scrape excess dried paint with a putty knife. Avoid scratching the surface.
- Use a Paint Remover: Apply an oil-based paint remover to the stain. Follow the manufacturer’s instructions and ensure thorough rinsing and drying.
For Fabric or Carpet:
- Blot Excess Paint: Blot the stain with a clean cloth to remove excess paint. Do not rub.
- Use a Solvent: Dampen a cloth with a paint thinner or mineral spirits and gently blot the stain. Ensure the solvent does not harm the fabric by testing it in an inconspicuous area.
- Wash Fabrics: For fabrics, launder the item following care label instructions after treating the stain.
Method 4: Preventive Measures
To avoid paint spill stains, consider the following preventive measures:
- Use Drop Cloths: Place drop cloths or plastic sheets over surfaces to catch any paint spills during projects.
- Protect Walls and Furniture: Cover walls and furniture with painter’s tape and plastic sheeting to prevent accidental spills.
- Work Carefully: When painting, work carefully and avoid overloading brushes or rollers with paint to minimize drips.
- Keep Cleaning Supplies Handy: Have paint thinner, rubbing alcohol, or paint removers on hand during painting projects to address spills promptly.
By following the appropriate methods for your specific situation and the type of paint involved, you can effectively remove paint spill stains, ensuring your surfaces remain clean and free of blemishes.
8. Chemical Cleaning Stains
Chemical cleaning agents, while effective at cleaning, can sometimes leave behind unsightly stains on various surfaces. These stains may result from chemical spills, improper use of cleaning products, or simply a reaction between the cleaning agent and the surface. Addressing chemical cleaning stains requires a different approach based on the type of surface and the nature of the stain. In this comprehensive analysis, we will explore effective methods for removing chemical cleaning stains, ensuring your surfaces remain clean and free of blemishes.
Method 1: Identifying the Stain
Before addressing chemical cleaning stains, it’s crucial to identify the type of stain and the surface it has affected. Common chemical cleaning agents include bleach, ammonia, and other household cleaners.
Method 2: General Stain Removal for Most Surfaces
For Painted Walls and Ceilings:
- Act Quickly: If you notice the chemical cleaning stain while it’s still fresh, act quickly. Use a clean, damp cloth to blot and gently lift the stain without spreading it. Do not rub.
- Rinse with Water: After blotting, rinse the area with water to dilute and remove any remaining cleaning agent. Dry the area with a clean cloth.
- Repaint: If the cleaning agent has caused discoloration or damage to the paint, you may need to touch up the area with matching paint after it dries.
For Hard Floors and Hard Surfaces:
- Scrape Excess Stain: Carefully scrape any dried or thickened cleaning agent with a plastic scraper. Avoid scratching the surface.
- Use a Neutralizing Agent: If the stain is from an acidic cleaner like vinegar, use a baking soda and water paste to neutralize it. If it’s from a basic cleaner like bleach, use a vinegar and water solution.
- Rinse and Dry: After neutralizing the stain, rinse the area with water and dry it thoroughly with a clean cloth.
For Fabrics and Upholstery:
- Blot the Stain: Blot the affected fabric or upholstery with a clean cloth to absorb excess cleaning agent. Do not rub, as this can spread the stain.
- Use a Neutralizing Agent: Depending on the type of cleaning agent, apply a suitable neutralizing agent. For example, vinegar can neutralize bleach, while baking soda paste can neutralize acidic cleaners.
- Launder or Dry Clean: If the fabric is machine-washable, launder it following care label instructions. For delicate or dry-clean-only fabrics, seek professional cleaning.
Method 3: Specialized Stain Removal for Specific Surfaces
Certain surfaces require unique treatments for chemical cleaning stains:
For Stainless Steel:
- Blot and Rinse: If you spill a chemical cleaner on stainless steel, immediately blot the affected area with a clean cloth and rinse it thoroughly with water. Dry it to prevent water spots.
- Use a Stainless Steel Cleaner: For stubborn stains or discoloration, use a specialized stainless steel cleaner. Follow the product’s instructions for application and polishing.
For Natural Stone (Granite, Marble, etc.):
- Blot and Rinse: Blot the affected area with a clean cloth and rinse with water. Do not let the cleaning agent sit for long.
- Use a Stone-Specific Neutralizer: Apply a stone-specific neutralizer to counteract the chemical’s effect. Follow the product’s instructions for use.
- Seal the Stone: To prevent future stains, consider sealing the natural stone with a stone sealer.
Method 4: Preventive Measures
To avoid chemical cleaning stains, follow these preventive measures:
- Read Product Labels: Always read and follow the instructions on cleaning product labels.
- Spot Test: Before using a cleaning agent on a new surface, perform a spot test in an inconspicuous area to ensure it won’t cause staining or damage.
- Proper Dilution: If a cleaner requires dilution, measure and mix it according to the manufacturer’s guidelines.
- Rinse Thoroughly: After using a cleaning agent, rinse the area thoroughly with water to remove any residues.
- Use Suitable Cleaners: Use cleaning agents designed for the specific surface you are cleaning to minimize the risk of stains.
By following the appropriate methods for your specific situation and the type of cleaning agent involved, you can effectively remove chemical cleaning stains, ensuring your surfaces remain clean and free of blemishes.

9. High Heel Shoe Scuff Marks
Scuff marks from high heel shoes can be a common issue, especially on hard flooring surfaces like wood, tile, or vinyl. These marks, caused by the friction between the shoe’s sole and the floor, can leave unsightly streaks and blemishes. Removing scuff marks from high heel shoes requires specific methods to ensure that your floors stay pristine. In this comprehensive analysis, we will explore effective techniques for removing scuff marks from various flooring surfaces, restoring their appearance.
Method 1: Identifying the Floor Type
Before addressing scuff marks from high heel shoes, it’s crucial to identify the type of flooring surface, as different methods are suitable for different materials.
Method 2: For Hardwood or Laminate Floors
For Fresh Scuff Marks:
- Baking Soda Paste: Create a paste using baking soda and a small amount of water.
- Gently Rub: Dampen a soft cloth or sponge and dip it into the paste. Gently rub the scuff mark. Be careful not to scrub too vigorously, as this can damage the finish.
- Wipe Clean: Wipe the area clean with a damp cloth and dry it immediately to prevent water damage to the wood.
For Stubborn Scuff Marks:
- Pencil Eraser: Use a white pencil eraser or an art gum eraser to gently rub the scuff mark. Be cautious not to apply too much pressure.
- Mineral Spirits: If the scuff mark persists, dampen a cloth with a small amount of mineral spirits and gently rub the area. Always follow the manufacturer’s safety instructions when using mineral spirits.
Preventive Measure: Consider placing felt pads under furniture or using rugs in high-traffic areas to prevent scuff marks.
Method 3: For Tile or Vinyl Floors
For Fresh Scuff Marks:
- Rub with a Tennis Ball: One effective and gentle way to remove scuff marks from tile or vinyl is to rub them with a tennis ball. The ball’s rubbery surface can lift the marks without damaging the floor.
- Rubbing Alcohol: Dampen a cloth with rubbing alcohol and gently rub the scuff marks. Test a small, inconspicuous area first to ensure it doesn’t harm the floor.
- Wipe Clean: After removing the marks, wipe the area clean with a damp cloth and dry it to prevent water damage.
For Stubborn Scuff Marks:
- Magic Eraser: Use a melamine foam cleaning sponge (commonly known as a Magic Eraser) to gently rub the scuff marks.
- Non-Acetone Nail Polish Remover: If the marks persist, you can apply a small amount of non-acetone nail polish remover to a cloth and gently rub the area. Rinse and dry the floor afterward.
Preventive Measure: Place doormats at entryways to reduce the likelihood of scuff marks from high heels.
Method 4: For Linoleum Floors
For Fresh Scuff Marks:
- Pencil Eraser: Use a white pencil eraser to gently rub the scuff marks.
- Baking Soda Paste: Create a paste using baking soda and a small amount of water. Dampen a soft cloth or sponge and dip it into the paste, then gently rub the scuff marks.
- Wipe Clean: Wipe the area clean with a damp cloth and dry it to prevent water damage.
For Stubborn Scuff Marks:
- Mineral Spirits: Dampen a cloth with a small amount of mineral spirits and gently rub the scuff marks. Always follow the manufacturer’s safety instructions when using mineral spirits.
- Commercial Linoleum Cleaner: Consider using a commercial linoleum cleaner as a last resort, following the product’s instructions carefully.
Preventive Measure: Place mats or area rugs in high-traffic areas to prevent scuff marks.
By following these methods based on your specific flooring type and the type of scuff mark, you can effectively remove these unsightly marks, ensuring your floors remain pristine and unblemished. Additionally, adopting preventive measures can help reduce the occurrence of scuff marks from high heel shoes in the future.

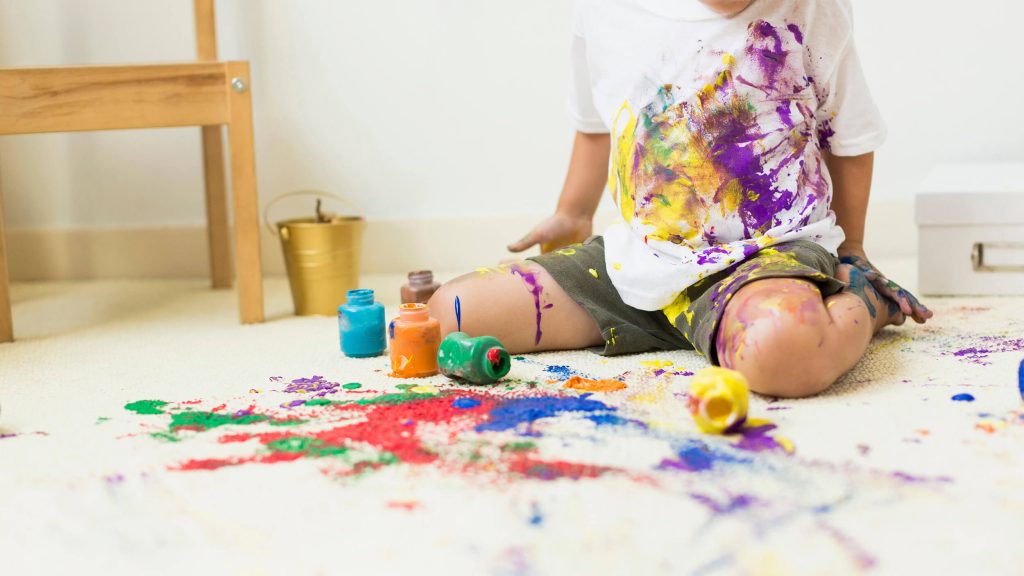
10. Ink Stains from Children’s Artwork
Ink stains resulting from children’s artwork can be a common occurrence, leaving unsightly marks on various surfaces, including clothing, walls, and furniture. These stains can be particularly stubborn, but with the right approach, they can be effectively removed. In this comprehensive analysis, we will explore effective techniques for removing ink stains from different surfaces, ensuring that your belongings remain stain-free and vibrant.
Method 1: Identifying the Stain
Before addressing ink stains from children’s artwork, it’s crucial to identify the type of ink and the affected surface, as different methods are suitable for different materials.
Method 2: For Clothing
For Water-Based Ink Stains:
- Act Quickly: Blot the stain with a clean cloth to absorb as much ink as possible. Avoid rubbing, as it can spread the stain.
- Rinse with Cold Water: Rinse the stained area under cold running water to remove more ink.
- Pre-Treat with Rubbing Alcohol: Apply rubbing alcohol to the stain using a cotton ball or cloth. Dab the stain gently, moving from the outer edges toward the center. Rinse and repeat if needed.
- Wash: Launder the garment as usual, following care label instructions. Check the stain before drying, as heat can set the ink.
For Permanent Ink Stains:
- Rubbing Alcohol: Apply rubbing alcohol to a cotton ball or cloth and gently blot the stain. Repeat until the ink is gone.
- Pre-Treat with Dish Soap: If the stain remains, apply a small amount of dishwashing liquid to the area. Gently rub and rinse. Launder the garment as usual.
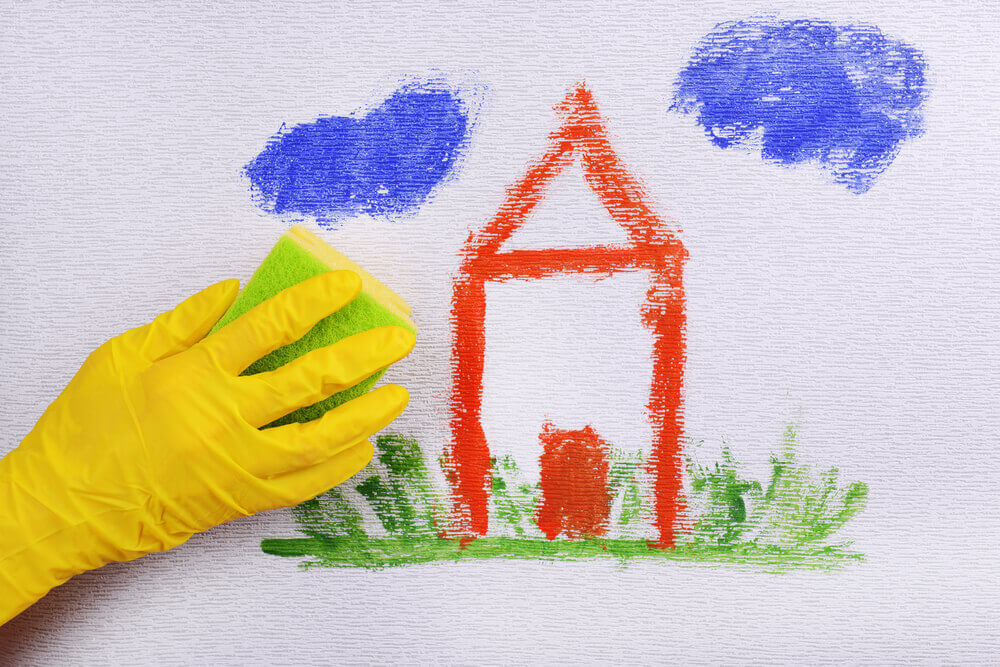
Method 3: For Walls
For Painted Walls:
- Isopropyl Alcohol: Dampen a cloth with isopropyl alcohol and gently rub the ink stain. Test an inconspicuous area first to ensure it doesn’t damage the paint.
- Magic Eraser: Use a melamine foam cleaning sponge (Magic Eraser) to gently scrub the stain. This can be particularly effective for removing ink from painted surfaces.
For Wallpaper:
- Rubbing Alcohol: Dampen a cloth with rubbing alcohol and gently blot the ink stain. Avoid rubbing too vigorously, as it may damage the wallpaper.
- Blot with Water: Rinse the area with a damp cloth to remove any remaining alcohol.
Method 4: For Furniture
For Wood Furniture:
- Rubbing Alcohol: Apply rubbing alcohol to a cloth and gently rub the ink stain. Follow the wood grain to avoid damaging the finish.
- Lemon Juice and Cream of Tartar: Make a paste using lemon juice and cream of tartar. Apply it to the stain, then wipe clean with a damp cloth.
For Upholstered Furniture:
- Rubbing Alcohol: Dampen a cloth with rubbing alcohol and blot the ink stain. Test a small, inconspicuous area first to ensure the alcohol won’t harm the fabric.
- Liquid Dish Soap: Apply a small amount of liquid dish soap mixed with water to the stain, then blot with a clean cloth. Rinse and blot with clean water.
Method 5: For Paper and Art Supplies
For Paper:
- Blot with Dry Paper Towel: Blot the wet ink stain with a dry paper towel to remove excess ink.
- Use Hairspray: Spray a small amount of hairspray on the stain. Blot with a clean cloth until the ink is removed.
For Art Supplies:
- Use a Specific Stain Remover: Some art supplies, like ink markers, have specific stain removers available. Follow the product’s instructions.
By following the appropriate methods for your specific situation and the type of ink involved, you can effectively remove ink stains from various surfaces. This ensures that your belongings remain free of unsightly blemishes and retain their vibrancy. It’s important to act promptly and use caution to avoid setting the stain further or causing damage..
Diving into the task of removing stains from your floors may require some time and effort, but proper techniques and quality products will ensure that your home’s floors stay clean and fresh.