Common Drainage System Issues and How to Address Them
This article will guide you through common drainage system issues in your home and provide effective solutions. Whether you’re a new homeowner or have been in your house for a while, understanding and addressing drainage system-related problems is an essential skill to possess.
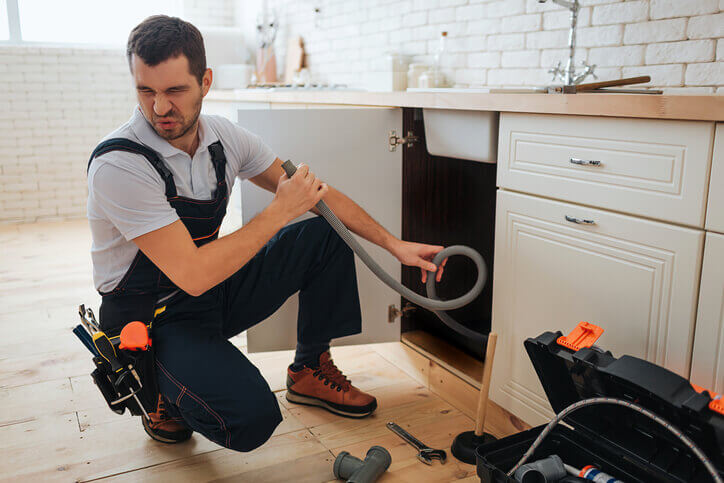
1. Clogged Sewer Pipes: Causes, Consequences, and Solutions
Clogged sewer pipes are a homeowner’s nightmare, and they are undoubtedly among the most common plumbing issues faced in households today. These obstructions can lead to unpleasant consequences, including slow drainage, foul odors, and potential structural damage. In this comprehensive guide, we will delve into the causes behind clogged sewer pipes, their potential consequences, and effective solutions to address this persistent problem.
Causes of Clogged Sewer Pipes
Understanding the root causes of clogged sewer pipes is crucial to preventing them in the first place. Here are some common culprits:
1.1. Accumulation of Debris and Grease
One of the primary reasons behind clogged sewer pipes is the accumulation of debris, grease, and foreign objects. Over time, as various items are flushed down the drain or washed down the sink, they can become lodged in the sewer pipes. These items may include food scraps, hair, soap scum, sanitary products, and even small toys in households with children.
1.2. Tree Roots Intrusion
Tree roots are relentless in their search for water sources, and they can infiltrate your sewer pipes through tiny cracks or joints. Once inside, they can grow and spread, causing significant blockages. Tree root intrusion is particularly common in older sewer systems with clay or cast iron pipes.
1.3. Aging Pipes
As sewer pipes age, they can deteriorate, develop cracks, or corrode. This can lead to an increased risk of blockages, as debris and roots can more easily infiltrate damaged pipes. Older homes with outdated plumbing systems are particularly susceptible to this issue.
Consequences of Clogged Sewer Pipes
The consequences of clogged sewer pipes extend beyond mere inconvenience. Ignoring the problem can result in severe and costly damage to your property. Here’s what can happen:
1.4. Slow Drainage
Slow drainage is one of the earliest signs of a clogged sewer pipe. As debris and obstructions accumulate, water and waste cannot flow freely. This can lead to water pooling in sinks, toilets, and showers, making daily activities uncomfortable and inefficient.
1.5. Foul Odors
The accumulation of waste and stagnant water in clogged sewer pipes creates a breeding ground for foul odors. Unpleasant smells can waft up from drains and permeate your living spaces, affecting your quality of life.
1.6. Backups and Overflows
If left unaddressed, clogged sewer pipes can cause sewage backups into your home. This is a dire situation that poses serious health risks and requires immediate professional intervention. Additionally, overflows can damage flooring, walls, and personal belongings, resulting in costly repairs.
Effective Solutions for Clogged Sewer Pipes
Now that we’ve explored the causes and consequences, let’s focus on the solutions for clogged sewer pipes. Timely intervention can prevent the situation from escalating. Here are the most effective remedies:
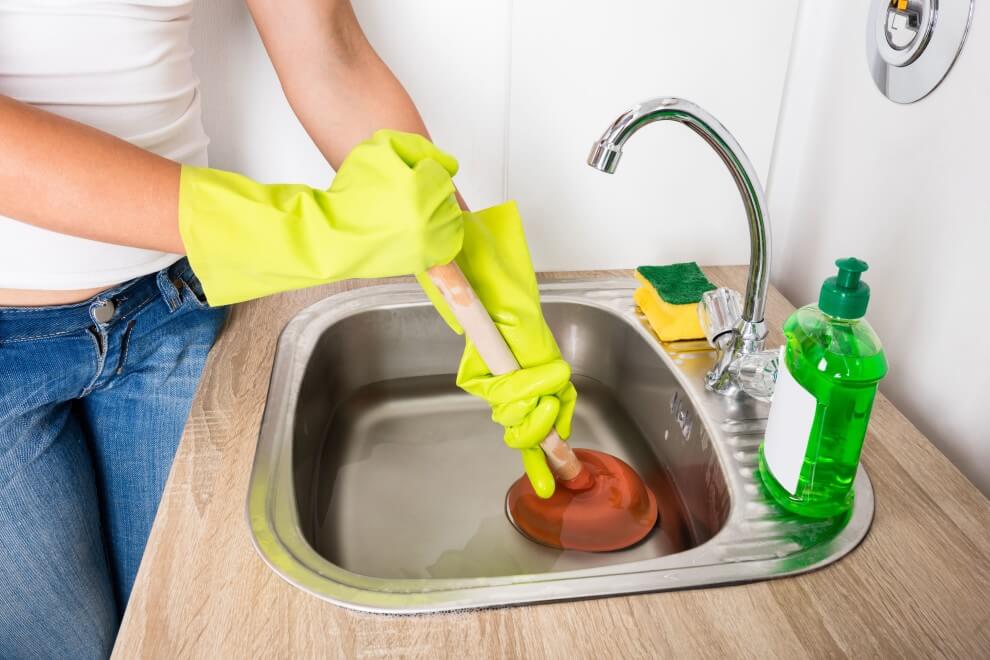
1.7. Use a Toilet Plunger
For minor clogs, a toilet plunger can be a homeowner’s best friend. To use this tool effectively:
- Place the plunger over the drain opening.
- Create a tight seal by pressing down firmly and ensuring there is enough water in the fixture to cover the plunger.
- Push and pull the plunger vigorously to create suction and dislodge the blockage.
- Repeat the process several times if necessary.
- Flush the drain with plenty of water to ensure the clog is fully cleared.
1.8. Employ a Drain Snake
For more stubborn clogs or those deeper within the pipes, a drain snake, also known as a plumber’s auger, can be incredibly effective:
- Insert the snake into the drain until you encounter resistance.
- Rotate the snake’s handle clockwise while pushing it further into the pipe.
- Continue rotating and pushing until you feel the snake break through the obstruction.
- Slowly withdraw the snake, taking care not to damage the pipes.
- Flush the drain with water to remove any remaining debris.
It’s important to note that while these DIY methods can address minor clogs, they may not be sufficient for severe blockages or recurring issues. In such cases, professional assistance from a licensed plumber is strongly recommended.
1.9. Preventive Measures
Preventing clogged sewer pipes is often more desirable than dealing with the consequences. Consider these preventive measures:
- Dispose of grease and cooking oil in a sealed container rather than pouring them down the drain.
- Install drain screens to catch hair and debris before they enter the pipes.
- Regularly maintain your plumbing system by scheduling professional inspections and cleanings.
- Be mindful of what you flush down the toilet or wash down the sink.
Clogged sewer pipes can be a significant inconvenience and lead to costly repairs if ignored. Understanding the causes, recognizing the consequences, and employing effective solutions are essential steps in maintaining a healthy plumbing system in your home. By taking preventive measures and addressing clogs promptly, you can minimize the likelihood of encountering this common plumbing issue and ensure the smooth operation of your sewer system.

2. Slow-Draining Water: Causes, Troubles, and Solutions
The annoyance of slow-draining water in sinks, toilets, or bathtubs is a common household issue that can disrupt daily routines. Understanding the causes behind this problem, recognizing the troubles it can lead to, and exploring effective solutions are essential for restoring smooth water flow in your home. In this comprehensive analysis, we will delve into the reasons for slow-draining water, the troubles it can cause, and practical solutions to address this common plumbing concern.
Causes of Slow-Draining Water
Understanding the root causes of slow-draining water is pivotal to resolving the issue effectively. Here are some prevalent culprits:
2.1. Accumulation of Residue and Build-Up
Over time, the inner walls of pipes can accumulate residue, grease, soap scum, and other debris. These build-ups can constrict the flow of water, leading to slow drainage. Common items like food particles, hair, and soap remnants contribute to this issue, especially in bathroom and kitchen drains.
2.2. Pipe Corrosion and Damage
Corroded or damaged pipes can hinder the passage of water, resulting in slow drainage. This can occur in both older and newer plumbing systems due to factors like rust, mineral deposits, or structural issues.
2.3. Tree Roots Intrusion
As mentioned earlier, tree roots are relentless in their pursuit of water sources. They can infiltrate sewer and drainage pipes, causing blockages that lead to slow drainage or even complete obstruction.
Troubles Caused by Slow-Draining Water
Slow-draining water is not merely a minor inconvenience; it can be a precursor to more severe plumbing problems. Here are some of the troubles it can cause:
2.4. Accumulation of Standing Water
Slow-draining water results in the accumulation of standing water in sinks, tubs, or toilets. This not only makes routine tasks like washing hands, taking showers, or flushing toilets cumbersome but also creates an unhygienic environment.
2.5. Foul Odors
Stagnant water, trapped debris, and organic matter in clogged pipes become a breeding ground for foul odors. These unpleasant smells can permeate your home, affecting your comfort and well-being.
2.6. Potential Pipe Damage
If left untreated, slow-draining water can lead to more severe pipe damage. The pressure exerted by standing water and corrosive substances can exacerbate existing issues, causing leaks, cracks, or burst pipes.
Effective Solutions for Slow-Draining Water
Now that we’ve examined the causes and troubles associated with slow-draining water, let’s explore practical solutions to alleviate this problem:
2.7. Use a Specialized Drain Cleaning Tool
Specialized drain cleaning tools are designed to remove residue and build-up from pipe walls effectively. Here’s how to use them:
- Insert the tool into the drain.
- Rotate and maneuver it to reach the inner pipe walls.
- Apply gentle pressure while moving the tool back and forth to dislodge and remove debris.
- Repeat the process until the water flows freely.
2.8. Utilize Drain Cleaning Products
Commercial drain cleaning products are readily available and can help dissolve clogs and build-up. Follow these steps when using such products:
- Ensure the affected area is well-ventilated.
- Wear protective gloves and eyewear.
- Pour the recommended amount of the product into the drain.
- Allow it to sit for the specified time to break down the clog.
- Flush the drain with plenty of water.
It’s important to read and follow the manufacturer’s instructions when using drain cleaning products, as improper use can be hazardous to your health and plumbing.
Preventive Measures
Preventing slow-draining water is often more manageable than dealing with the consequences. Consider these preventive measures:
- Install drain screens or catchers to prevent hair and debris from entering drains.
- Be mindful of what you pour down drains, avoiding the disposal of grease, oils, or large food particles.
- Schedule routine professional plumbing inspections and maintenance to detect and address issues before they escalate.
Slow-draining water is a common plumbing issue that, if left unattended, can lead to more severe troubles. Understanding the causes, recognizing potential consequences, and employing effective solutions are essential steps in maintaining a functional plumbing system in your home. By taking preventive measures and addressing slow drainage promptly, you can avoid the inconvenience and potential damage associated with this common household problem and ensure the smooth flow of water in your plumbing system.
3. Unpleasant Odors from Drainage Pipes: Causes, Impact, and Remedies
Dealing with unpleasant odors wafting from your drainage pipes can be a frustrating and uncomfortable experience. In this comprehensive analysis, we will explore the various factors that can lead to these unwelcome scents, the potential impact they can have on your home and well-being, and, most importantly, the practical solutions to mitigate and eliminate these odors.
Causes of Unpleasant Odors from Drainage Pipes
Understanding the root causes of foul odors from drainage pipes is crucial to effectively addressing the issue. Several factors can contribute to this problem:
3.1. Trapped Debris and Organic Matter
Over time, debris, hair, soap scum, and other organic matter can accumulate within your drainage pipes. These materials provide an ideal environment for the growth of bacteria and other microorganisms, which produce foul-smelling gases.
3.2. Blocked or Clogged Drains
Blocked or clogged drains can trap water in the pipes, creating a stagnant pool. This standing water can become a breeding ground for bacteria and emit unpleasant odors.
3.3. Sewer Gas Infiltration
Sewer gas, which contains various noxious gases, can infiltrate your home through damaged or improperly sealed drainage pipes. The smell of sewer gas is highly unpleasant and can pose health risks.
Impact of Unpleasant Drainage Odors
The presence of foul odors from drainage pipes can have several negative consequences for your home and quality of life:
3.4. Discomfort and Health Concerns
Persistent foul odors can cause discomfort, headaches, nausea, and even respiratory issues. They can affect your overall well-being and that of your family members.
3.5. Reduced Indoor Air Quality
Unpleasant odors can significantly reduce the quality of the air inside your home. This can lead to an unhealthy living environment and contribute to a decline in the overall indoor air quality.
3.6. Social and Psychological Effects
Foul odors can be embarrassing when guests visit your home, impacting your social interactions and self-esteem. They can also cause psychological distress and anxiety.
Remedies for Unpleasant Odors from Drainage Pipes
Addressing and eliminating unpleasant odors from your drainage pipes is crucial for a healthier and more comfortable living space. Here are effective solutions to consider:
3.7. Ensure Proper Sealing of Toilets and Sinks
Check that toilets and sinks are properly sealed with no gaps or cracks that could allow odors to escape. If you find any gaps, seal them with appropriate sealants or contact a professional plumber for repairs.
3.8. Address Cracks and Leaks
Inspect your drainage system for any cracks or leaks, especially in the pipes themselves or the seals around connections. These issues can allow foul odors to escape into your home. If you discover cracks or leaks, consult a plumber to repair or replace the affected components promptly.
3.9. Use Odor Eliminators
Utilize air fresheners or natural odor-absorbing substances to combat unpleasant smells. Consider placing odor-absorbing products, such as activated charcoal or baking soda, near the source of the odor. These substances can help neutralize the smell effectively.
3.10. Professional Drain Cleaning
For persistent odor issues, consider hiring a professional plumber to perform a thorough drain cleaning. Professional plumbers have specialized equipment and expertise to remove built-up debris and bacterial colonies from your drainage system.
Preventive Measures
Preventing unpleasant odors from drainage pipes is key to maintaining a fresh and odor-free home environment:
- Regularly clean and maintain your drains by flushing them with hot water and a mixture of baking soda and vinegar.
- Use drain screens or catchers to prevent hair and debris from entering and accumulating in your drains.
- Schedule routine plumbing inspections to catch and address issues before they result in odorous problems.
Addressing and eliminating unpleasant odors from drainage pipes is essential for a comfortable and healthy living space. By understanding the causes, recognizing the potential impact on your home and well-being, and employing effective remedies and preventive measures, you can maintain an odor-free and enjoyable environment for you and your family. Don’t let foul odors disrupt your daily life; take action to ensure that your drainage system remains clean, functional, and odor-free.
4. Burst or Broken Water Pipes: Causes, Immediate Actions, and Professional Solutions
A burst or broken water pipe is a homeowner’s nightmare that can lead to extensive damage if not addressed promptly and effectively. In this comprehensive analysis, we will delve into the various factors that can cause water pipes to burst or break, the critical immediate actions you should take to minimize damage, and the importance of seeking professional assistance in the face of extensive damage or uncertainty.
Causes of Burst or Broken Water Pipes
Understanding the underlying causes of water pipes bursting or breaking is fundamental to both prevention and effective response. Several factors can contribute to this distressing issue:
4.1. Freezing Temperatures
One of the most common causes of burst pipes is exposure to freezing temperatures. When water freezes inside a pipe, it expands, exerting pressure on the pipe walls. Over time, this can lead to cracks or ruptures.
4.2. Aging Pipes
Older pipes, especially those made of materials like galvanized steel, are more prone to corrosion and weakening. As they age, they become increasingly susceptible to bursts and breaks.
4.3. High Water Pressure
Excessive water pressure within your plumbing system can strain pipes, causing them to rupture or burst. This is particularly common in areas with poorly regulated water pressure.
4.4. Physical Damage
Accidental physical damage from construction work or other activities can result in cracked or broken pipes. Even minor impacts can weaken pipes over time, leading to eventual failure.
Immediate Actions to Address Burst or Broken Water Pipes
When confronted with a burst or broken water pipe, it’s crucial to act swiftly to minimize damage and ensure your safety:
4.5. Turn Off the Water Supply
Locate the main water shutoff valve for your home and turn it off immediately. This will stop the flow of water to the damaged pipe and prevent further flooding.
4.6. Isolate the Damaged Area
Identify the specific section of the pipe that is damaged, if possible. You can do this by examining your plumbing system or, in some cases, by visually spotting the break or leak. If you can isolate the damaged area, you may be able to contain the problem more effectively.
4.7. Temporary Sealing
For minor cracks or leaks, you can use specialized repair tape or pipe clamps as a temporary solution to stop or reduce the flow of water. These products are readily available at most hardware stores and can be applied quickly in emergency situations.
Importance of Professional Assistance
While immediate actions can help mitigate damage temporarily, it’s essential to recognize when professional intervention is necessary:
4.8. Extensive Damage
If the damage is extensive, such as a major rupture or multiple leaks, attempting a DIY repair may not be effective. In such cases, it’s best to call a professional plumber immediately.
4.9. Uncertainty
If you are unsure about the extent of the damage, the location of the issue, or how to handle the situation safely, it’s wise to seek professional guidance. DIY repairs in situations you’re unfamiliar with can potentially worsen the problem.
4.10. Aging Pipes
If your home has older pipes, it’s prudent to schedule regular inspections with a professional plumber. They can assess the condition of your plumbing system, identify weak points, and recommend necessary maintenance or replacements to prevent future bursts or breaks.
Understanding the causes of burst or broken water pipes, taking immediate actions to contain the damage, and knowing when to seek professional assistance are vital aspects of homeownership. Burst pipes can lead to extensive water damage, structural issues, and financial burdens, making it imperative to address them promptly and effectively. By following the recommended steps and recognizing the significance of professional help, you can navigate the challenges posed by burst or broken water pipes and maintain a safe, functional, and secure home environment. Remember that prevention and proactive maintenance are key to reducing the likelihood of facing such plumbing emergencies in the future.

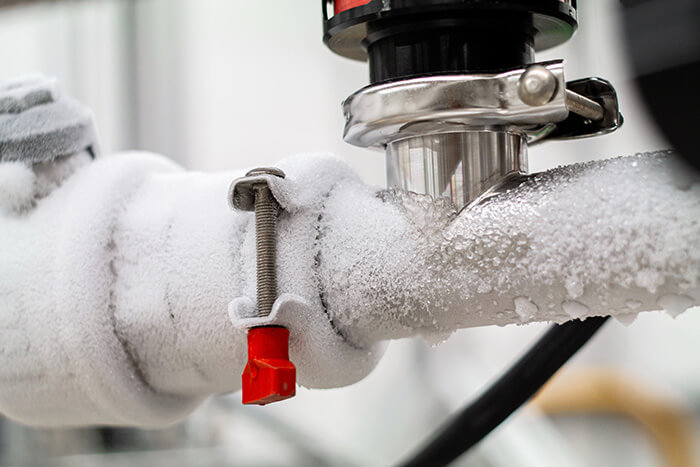
5. Frozen Water Pipes: Causes, Prevention, and Thawing Techniques
Frozen water pipes are a common wintertime woe that can wreak havoc on your plumbing system. When pipes freeze, they can not only disrupt water flow but also lead to costly damage. In this extensive analysis, we will delve into the causes behind frozen water pipes, explore preventative measures to safeguard your plumbing, and provide practical methods for thawing pipes when they inevitably freeze.
Causes of Frozen Water Pipes
Understanding why water pipes freeze is essential for implementing effective prevention strategies. Several factors contribute to this issue:
5.1. Subfreezing Temperatures
The most obvious cause of frozen pipes is subfreezing temperatures. When exposed to extreme cold, the water inside pipes can freeze, expanding and exerting immense pressure on the pipe walls.
5.2. Inadequate Insulation
Pipes located in unheated or poorly insulated areas of your home are more susceptible to freezing. Insufficient insulation allows cold air to reach the pipes, increasing the risk of freezing.
5.3. Exposed Pipes
Pipes located outside the home, in crawl spaces, or along exterior walls are particularly vulnerable to freezing. Exposure to cold air makes these pipes more prone to freezing.
5.4. Rapid Temperature Drops
Sudden and severe drops in temperature can quickly freeze pipes. This can happen when a warm spell is followed by a sudden cold snap.
Preventing Frozen Water Pipes
Now that we’ve explored the causes, let’s delve into proactive measures to prevent water pipes from freezing:
5.5. Pipe Insulation
One of the most effective preventative measures is insulating your pipes. Pipe insulation or insulating material, readily available at hardware stores, can be wrapped around pipes to create a barrier against the cold.
5.6. Heat Tape
Electric heat tape is another valuable tool for preventing frozen pipes. It can be applied directly to pipes and activated when temperatures drop. Heat tape is particularly useful for vulnerable pipes in unheated areas.
5.7. Maintain Adequate Heating
Ensuring that your home remains adequately heated, even in unoccupied areas, is crucial for pipe protection. Keep interior doors open to allow warm air to circulate and reach all areas of your home.
5.8. Seal Cracks and Gaps
Seal any cracks or gaps in the walls, floors, or foundation of your home. These openings can allow cold air to infiltrate and affect pipe temperatures.
5.9. Running Water
When extremely cold weather is forecasted, leave a small stream of water running from faucets. The continuous flow of water can prevent pipes from freezing, as moving water is less likely to freeze than stagnant water.
Thawing Frozen Water Pipes
Despite the best preventive efforts, pipes can still freeze. In such cases, immediate action is required to avoid further damage:
5.10. Locate the Freeze
Determine which section of the pipe is frozen. This may involve feeling along the length of the pipe for extremely cold areas or identifying areas where no water is flowing.
5.11. Apply Heat
Once you’ve identified the frozen section, you can apply heat to thaw the pipe. There are several safe methods for doing this:
- Space Heater: Use a space heater to warm the area around the frozen pipe slowly. Avoid placing the heater too close to the pipe to prevent overheating.
- Hair Dryer: A hair dryer set to the highest heat setting can also be used to thaw a frozen pipe. Move the dryer back and forth along the frozen area until water flows again.
- Warm Towels: Soak towels in warm water and wrap them around the frozen pipe. Change the towels regularly as they cool.
- Warm Water: If the frozen pipe is accessible, you can pour warm (not boiling) water over the frozen area. Start at the end closest to the faucet and work your way toward it.
- Electric Heating Pad: An electric heating pad can be wrapped around the pipe to provide consistent, gentle heat.
Caution: Never use open flames or high-temperature devices like propane torches to thaw frozen pipes, as this can lead to pipe damage or fires.
Conclusion
Remember that understanding how to address common drainage system issues can save you time and money. If you encounter significant problems or are not confident in handling the situation, don’t hesitate to call a professional plumber for assistance. Maintaining your drainage system ensures comfort and safety in your home.