Mastering Photo Editing: Techniques for Creating Stunning Images
Photo editing is a crucial step in the journey of photography. It allows you to transform ordinary pictures into extraordinary works of art. As a professional photographer, knowing how to edit your photos effectively is essential to make your portfolio stand out. In this comprehensive guide, we will explore various techniques and tips for achieving breathtaking photo edits that will leave a lasting impression.

Section 1: Essential Editing Tools and Software
1.1. Choosing the Right Editing Software:
- Explanation: Selecting the appropriate editing software is the first step in achieving stunning photo edits.
- Tips: Consider industry-standard software like Adobe Photoshop or Lightroom for advanced editing capabilities.
1.2. Understanding Editing Basics:
- Explanation: Familiarize yourself with fundamental editing concepts such as exposure, contrast, saturation, and sharpness.
- Tips: Start with simple adjustments before diving into more advanced techniques.
Section 2: Enhancing Colors and Tones
2.1. Perfecting Color Balance:
- Explanation: Adjust color balance to make sure the colors in your photo appear true to life.
- Tips: Use tools like white balance correction and color grading to enhance the overall color harmony.
2.2. Controlling Exposure:
- Explanation: Achieve balanced exposure by adjusting highlights, shadows, and midtones.
- Tips: Utilize exposure adjustment layers for precise control over different areas of your image.
Section 3: Retouching and Refining Details
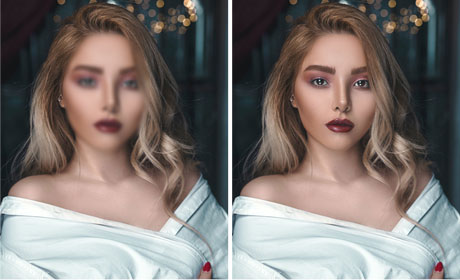
3.1. Skin Retouching:
- Explanation: Enhance portraits by retouching skin imperfections while maintaining a natural look.
- Tips: Use frequency separation for professional-level skin retouching.
3.2. Sharpening Techniques:
- Explanation: Apply sharpening to make the details in your photos pop.
- Tips: Use a combination of capture sharpening, creative sharpening, and output sharpening for optimal results.
Section 4: Creative Editing
4.1. Adding Filters and Presets:
- Explanation: Experiment with filters and presets to create unique looks and styles.
- Tips: Develop your custom presets to establish a distinct editing signature.
4.2. Artistic Effects:
- Explanation: Add artistic effects like texture overlays, vignettes, and light leaks for creative impact.
- Tips: Blend modes and layer masks can help you control the intensity of these effects.
Section 5: Advanced Editing Techniques
5.1. Composite Images:
- Explanation: Create composite images by blending multiple photos seamlessly.
- Tips: Pay attention to lighting and perspective to ensure a realistic result.
5.2. HDR Editing:
- Explanation: Use High Dynamic Range (HDR) editing to merge multiple exposures for exceptional tonal range.
- Tips: Bracket your shots and use HDR-specific software for best results.

Section 6: Exporting and Sharing
6.1. File Formats and Resolutions:
- Explanation: Choose the right file format and resolution for your intended use (web, print, social media).
- Tips: Maintain a high-resolution original file for future editing and printing.
6.2. Sharing Your Work:
- Explanation: Share your edited photos on various platforms to showcase your skills and build your brand.
- Tips: Use watermarks and metadata to protect your work and provide essential information.
Section 7: Specialized Editing Styles
7.1. Black and White Conversion:
- Explanation: Converting photos to black and white can add a timeless and dramatic touch to your images.
- Tips: Experiment with different black and white presets and adjust individual color channels for precise control over grayscale tones.
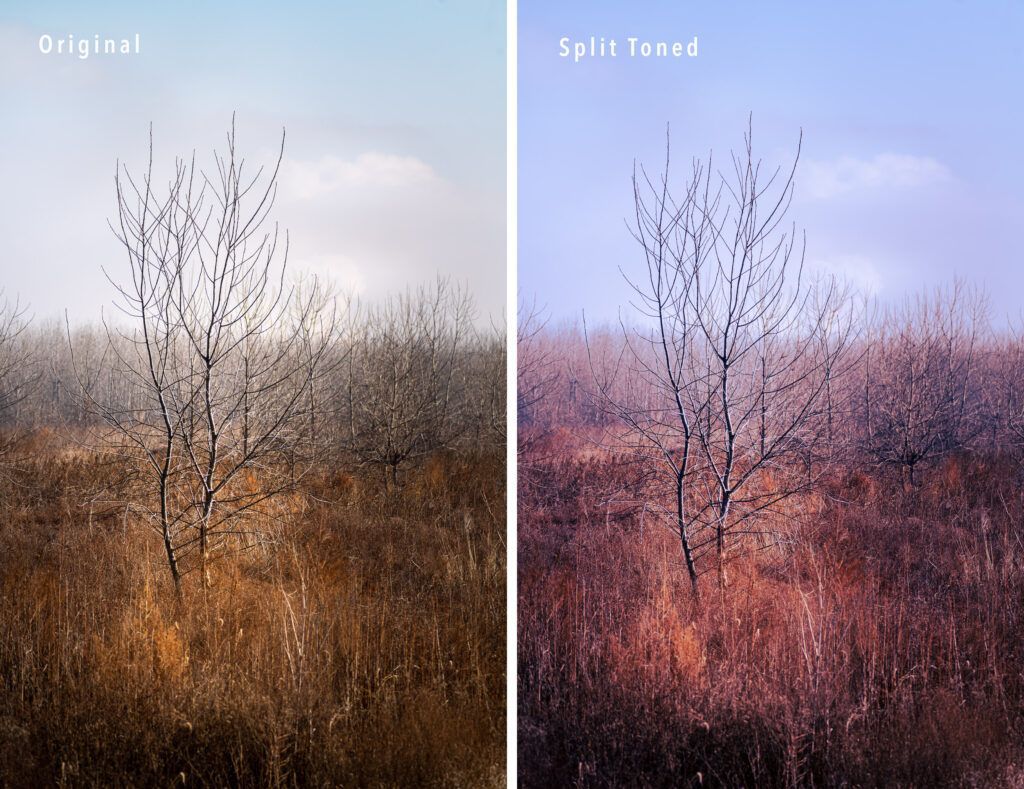
7.2. Color Grading:
- Explanation: Color grading goes beyond basic color adjustments; it’s about setting the mood and enhancing the storytelling in your photos.
- Tips: Study cinematic color grading techniques and apply them to your photography for a unique and compelling look.
Section 8: Photo Restoration and Repair
8.1. Restoring Old Photos:
- Explanation: Learn how to bring life back to damaged or faded old photographs.
- Tips: Utilize tools like the healing brush and clone stamp to repair cracks, tears, and blemishes.
8.2. Removing Unwanted Elements:
- Explanation: Sometimes, you may need to remove distracting elements or people from your photos.
- Tips: Use advanced selection techniques and content-aware fill to seamlessly eliminate unwanted objects.
Section 9: Batch Editing for Efficiency
9.1. Automating Repetitive Tasks:
- Explanation: Streamline your workflow by automating repetitive editing tasks.
- Tips: Create and apply batch actions to save time when editing multiple photos with similar adjustments.
9.2. Metadata and Keywording:
- Explanation: Organize and tag your photos with metadata and keywords for easy retrieval and cataloging.
- Tips: Use photo management software to efficiently add metadata and keyword information to your entire photo library.
Section 10: Continuous Learning and Inspiration
10.1. Online Resources:
- Explanation: Stay updated with the latest editing techniques and trends by following photography blogs, YouTube channels, and online courses.
- Tips: Engage with the photography community to exchange ideas and gain inspiration from fellow photographers.
10.2. Personal Projects:
- Explanation: Undertake personal projects that challenge your editing skills and push your creative boundaries.
- Tips: Document your journey, successes, and failures to track your growth as an editor and photographer.

Photo editing is a dynamic and evolving field that offers endless possibilities for creativity. By delving deeper into advanced techniques, you can elevate your editing skills and produce truly remarkable images. Remember that practice is key to improvement, and there’s always something new to discover in the world of photo editing. Embrace the process, keep experimenting, and never stop learning. With dedication and passion, you can create breathtaking photos that tell compelling stories and leave a lasting impact on your audience. Happy editing!